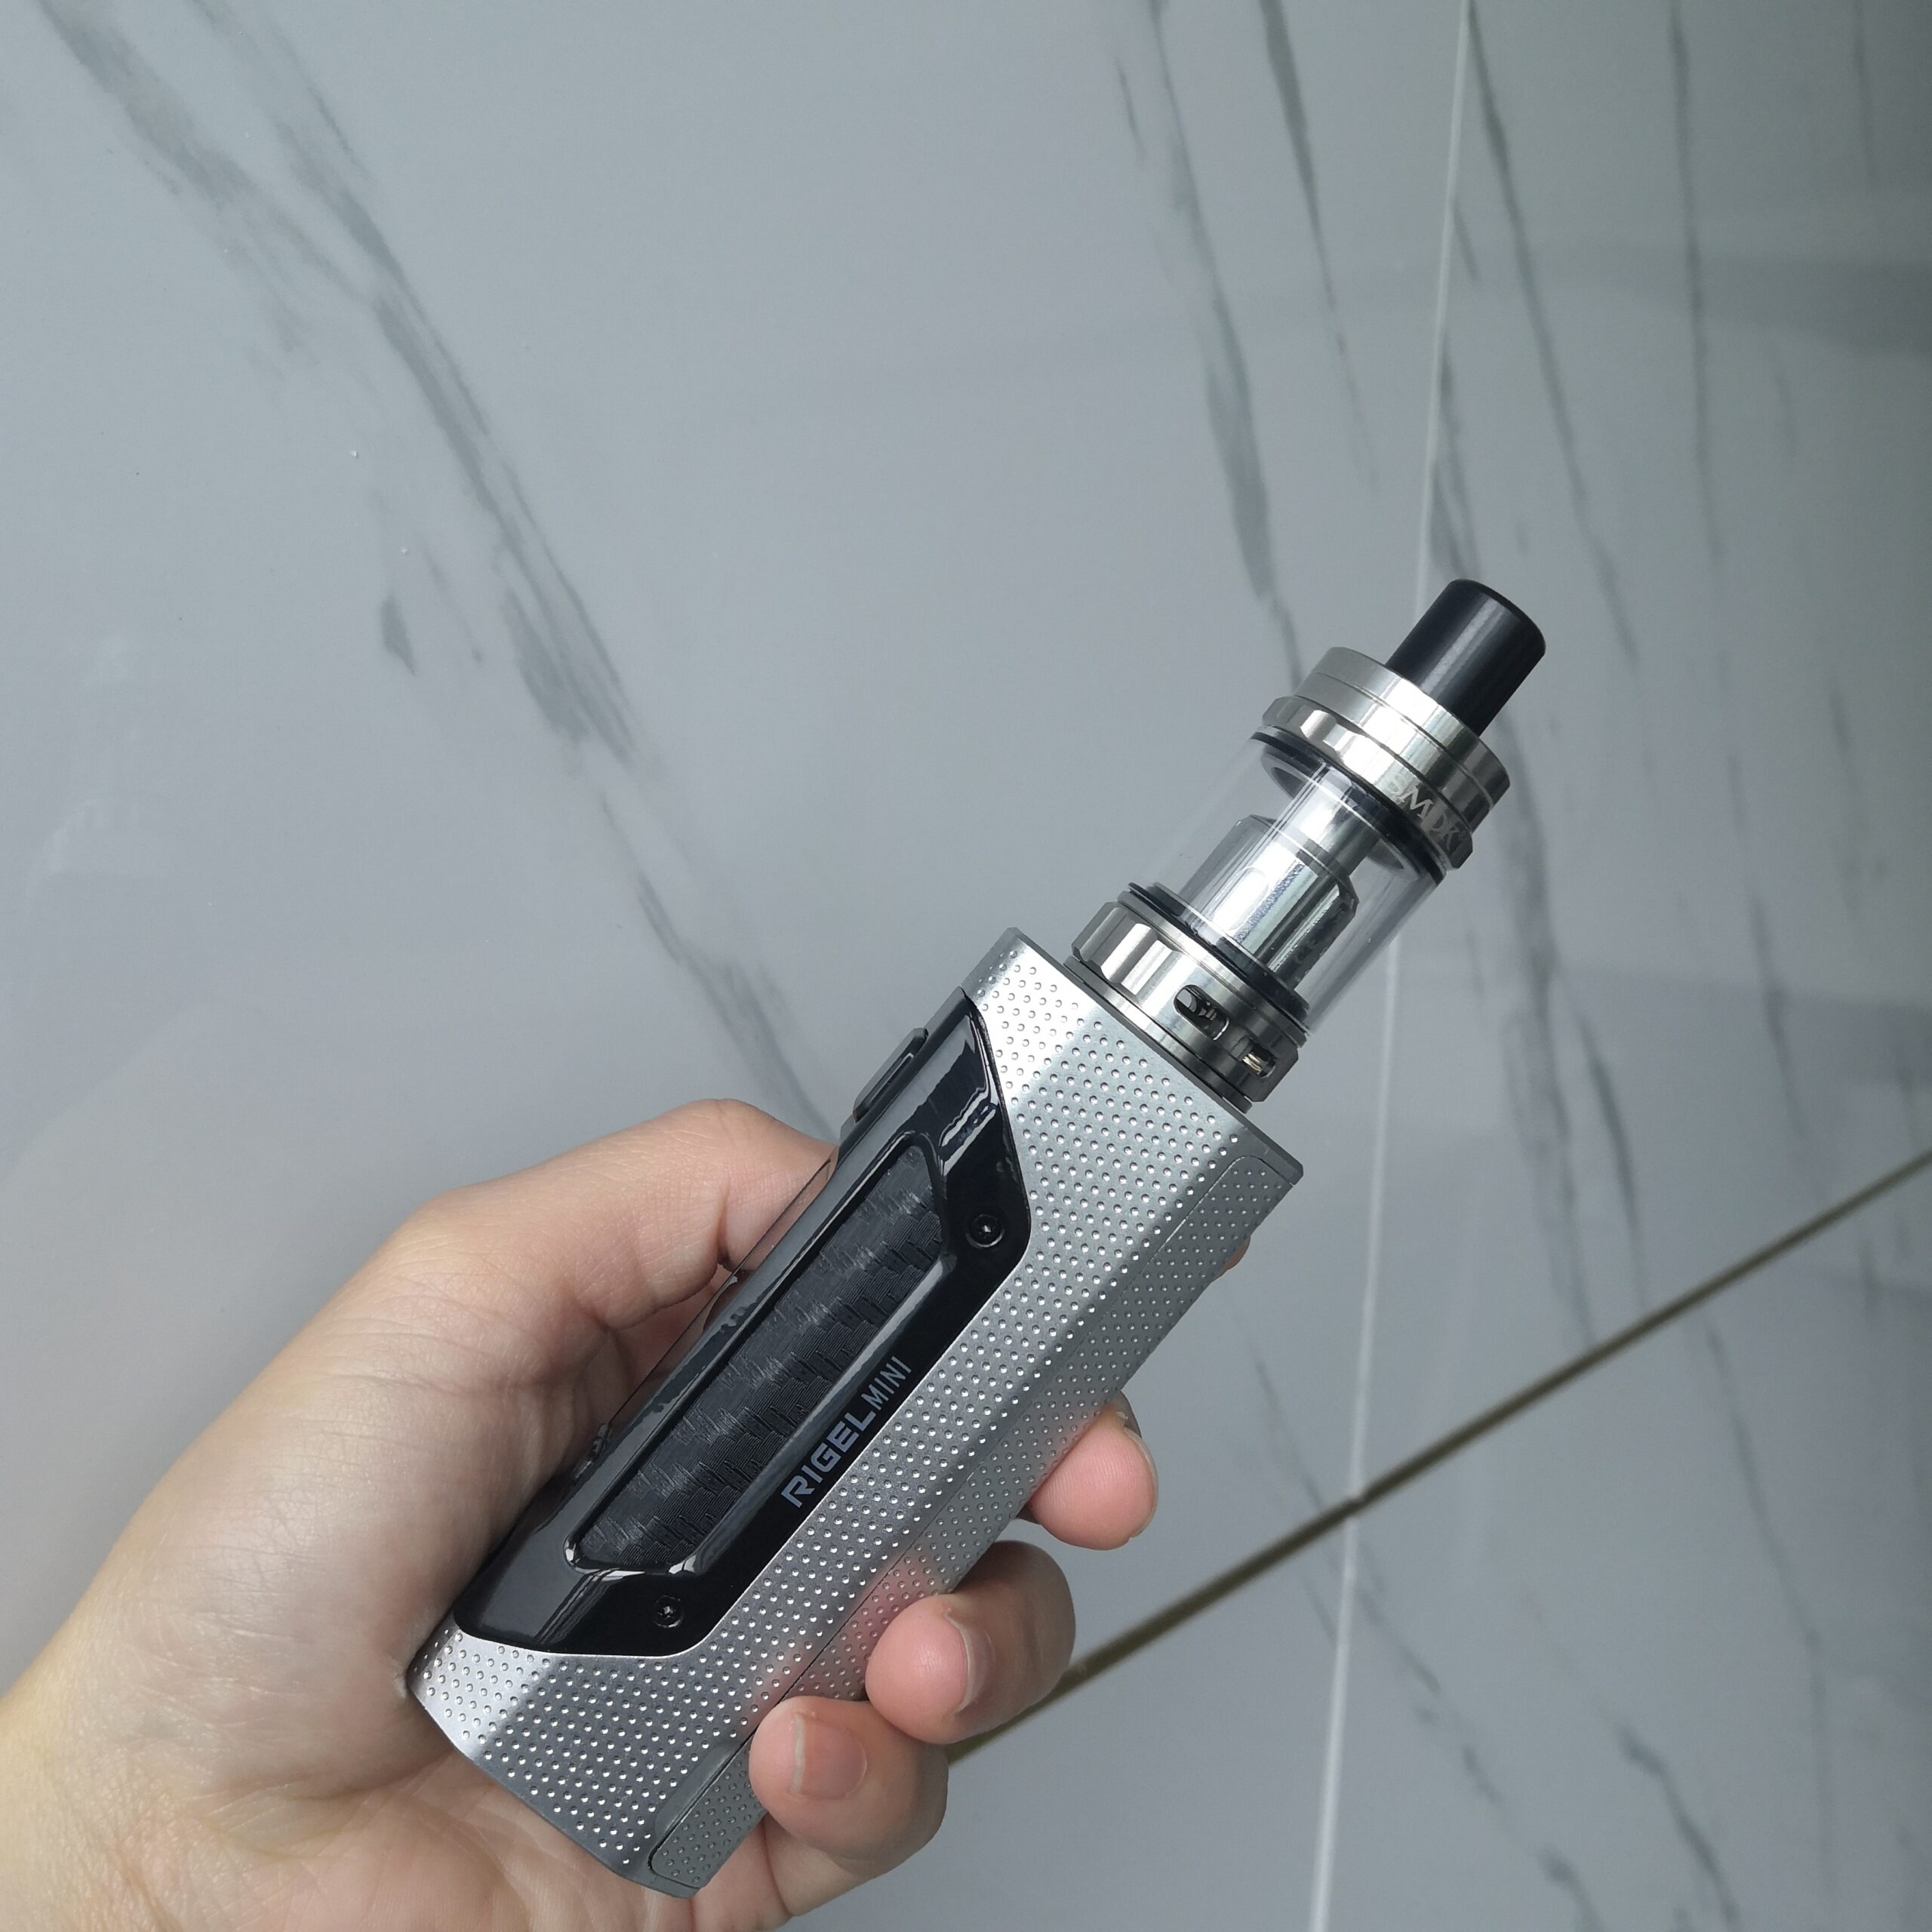
Safety Instructions
1) Charge the battery indoors only,
2) Do not use any power source that does not have a local legal manufacturing license.
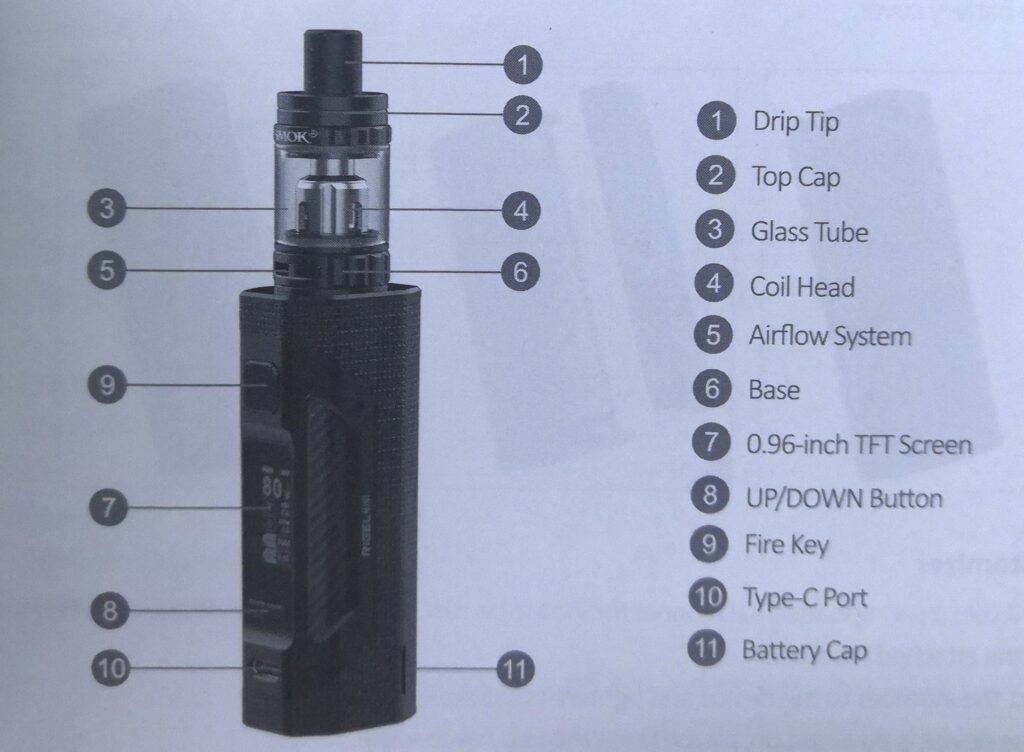
Components
Preparation before use
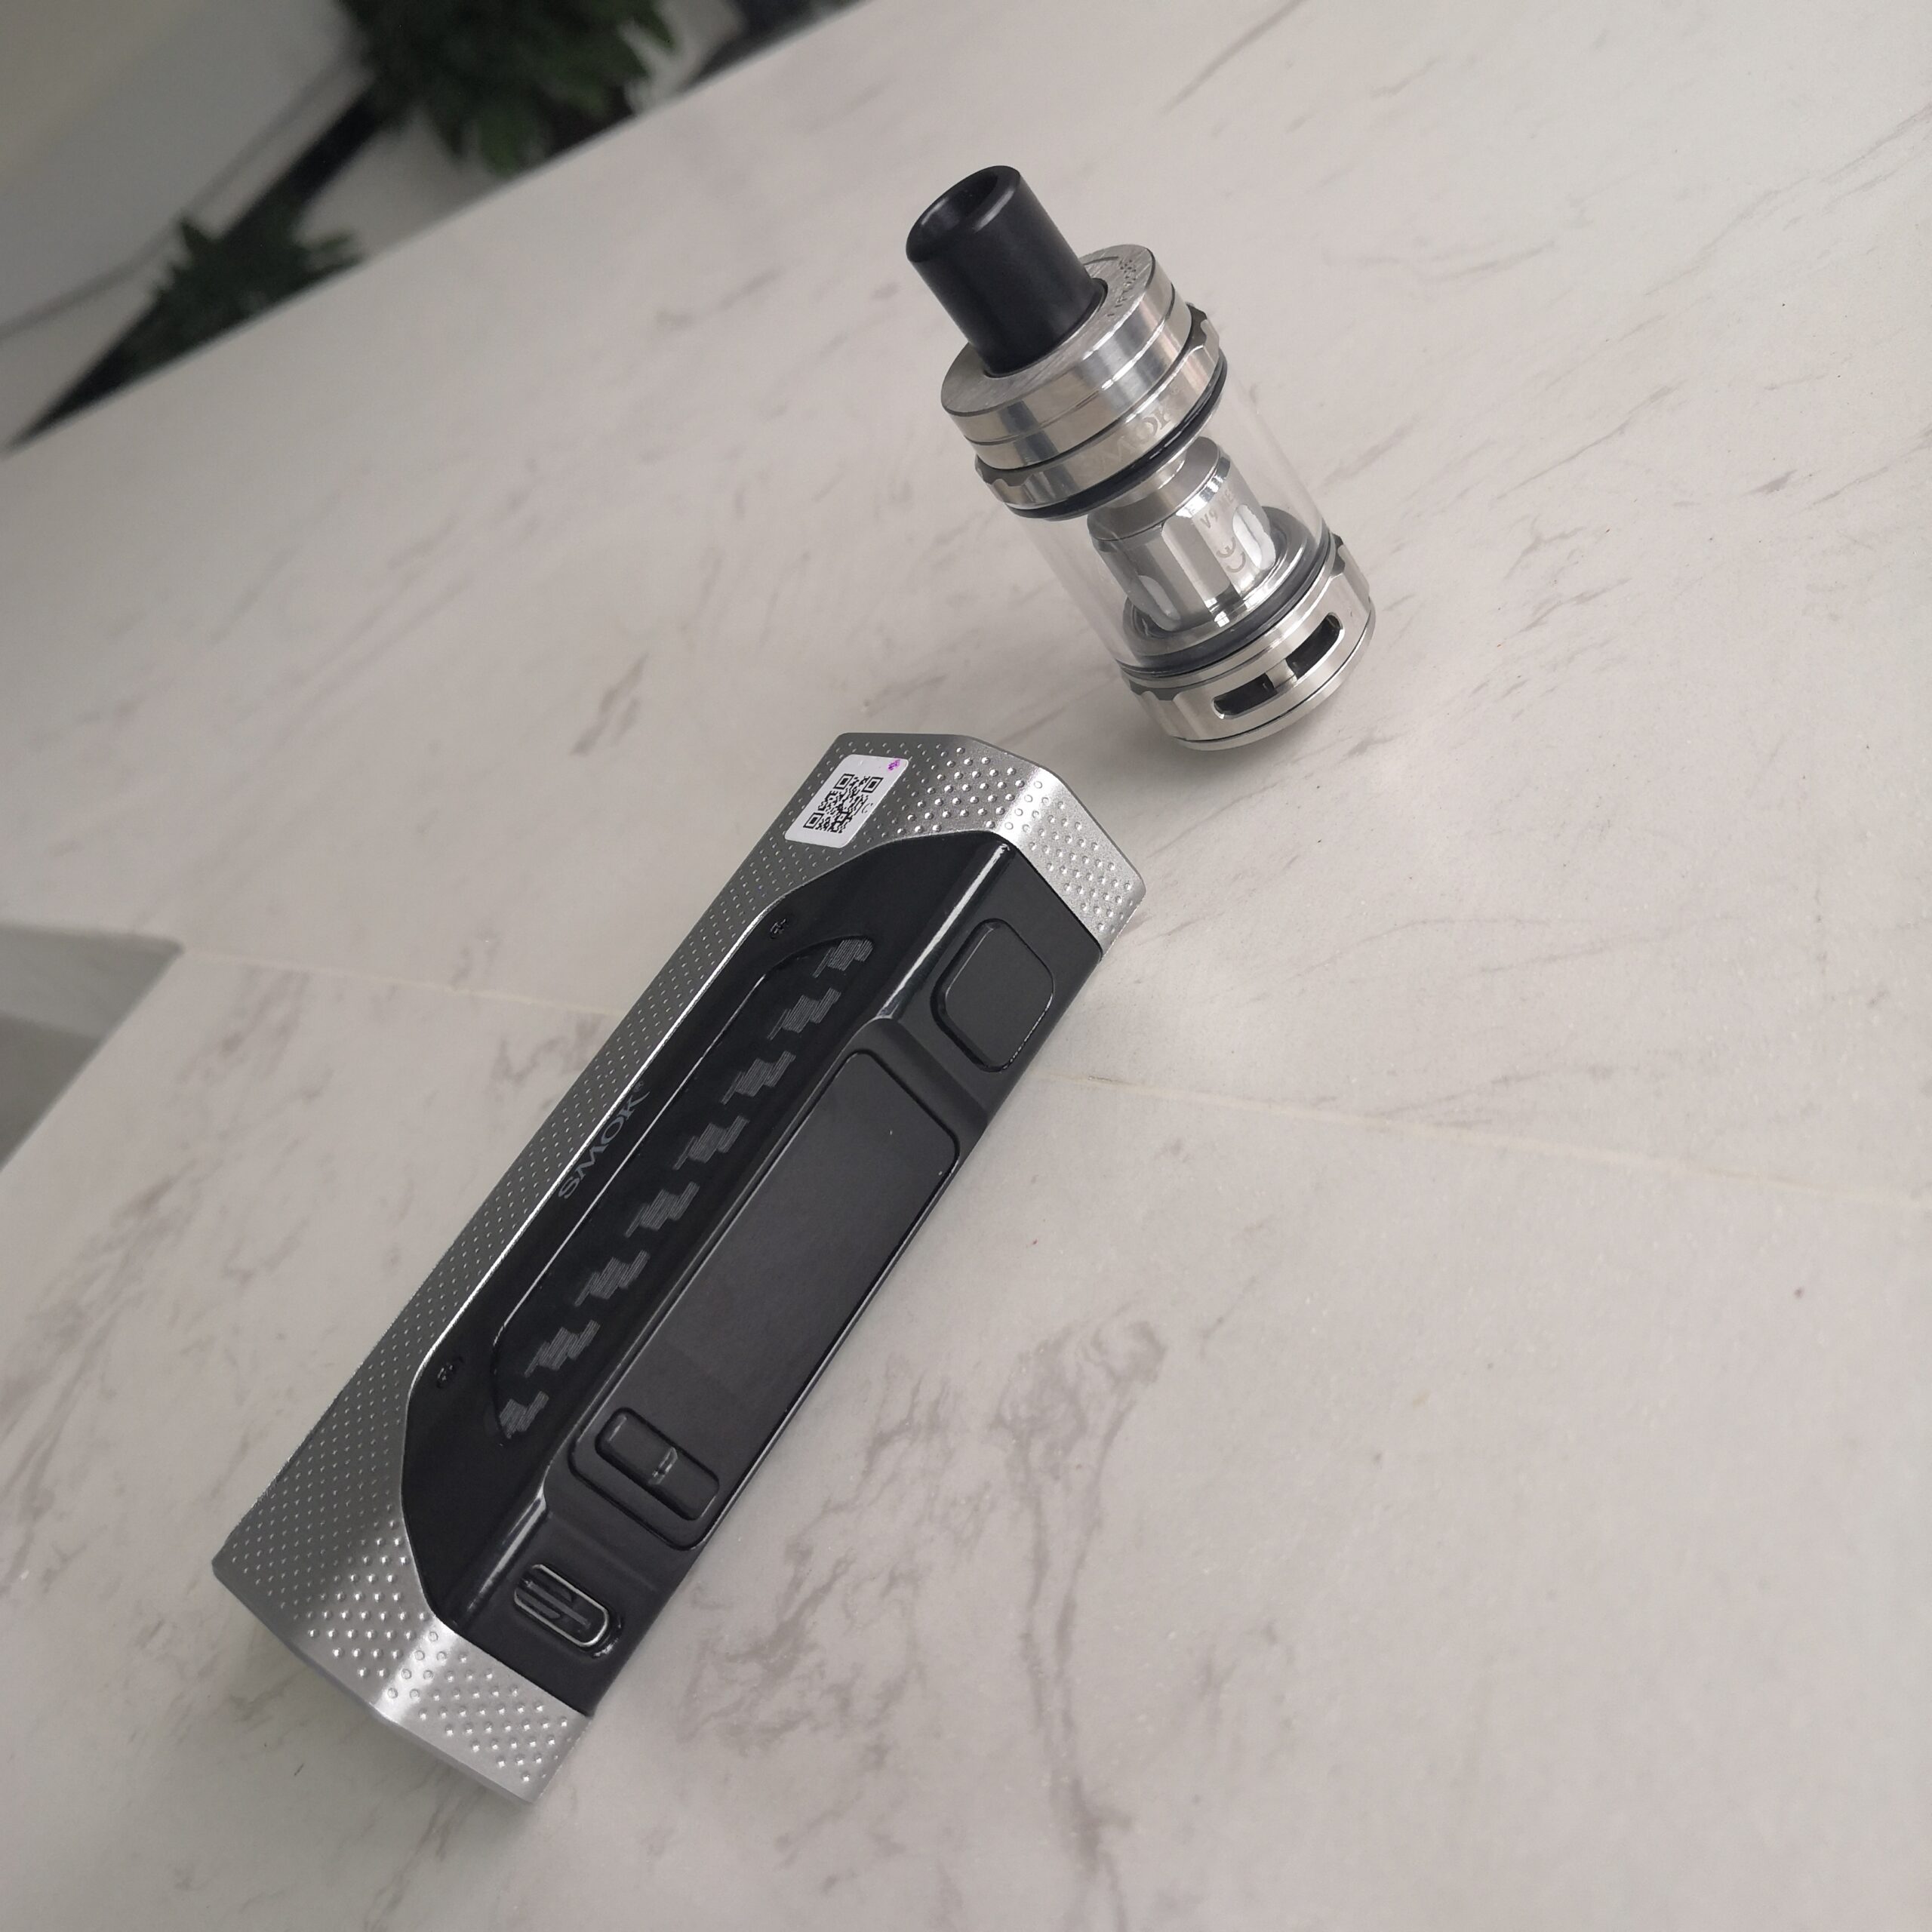
1) Please make sure the battery you’re using corresponds with the BATTERY WARNING CARD
2) Before vaping, please make sure the pod is filled with enough juice.
Battery Installation
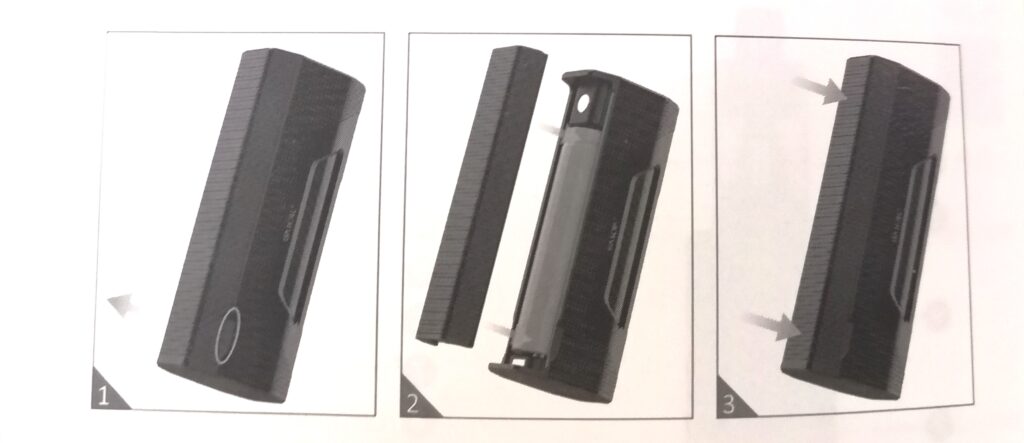
1) Open the battery cover as the picture shows;
2) Put the battery into the battery slot in the correct direction,
3) Cose the battery cover.
Attach Atomizer
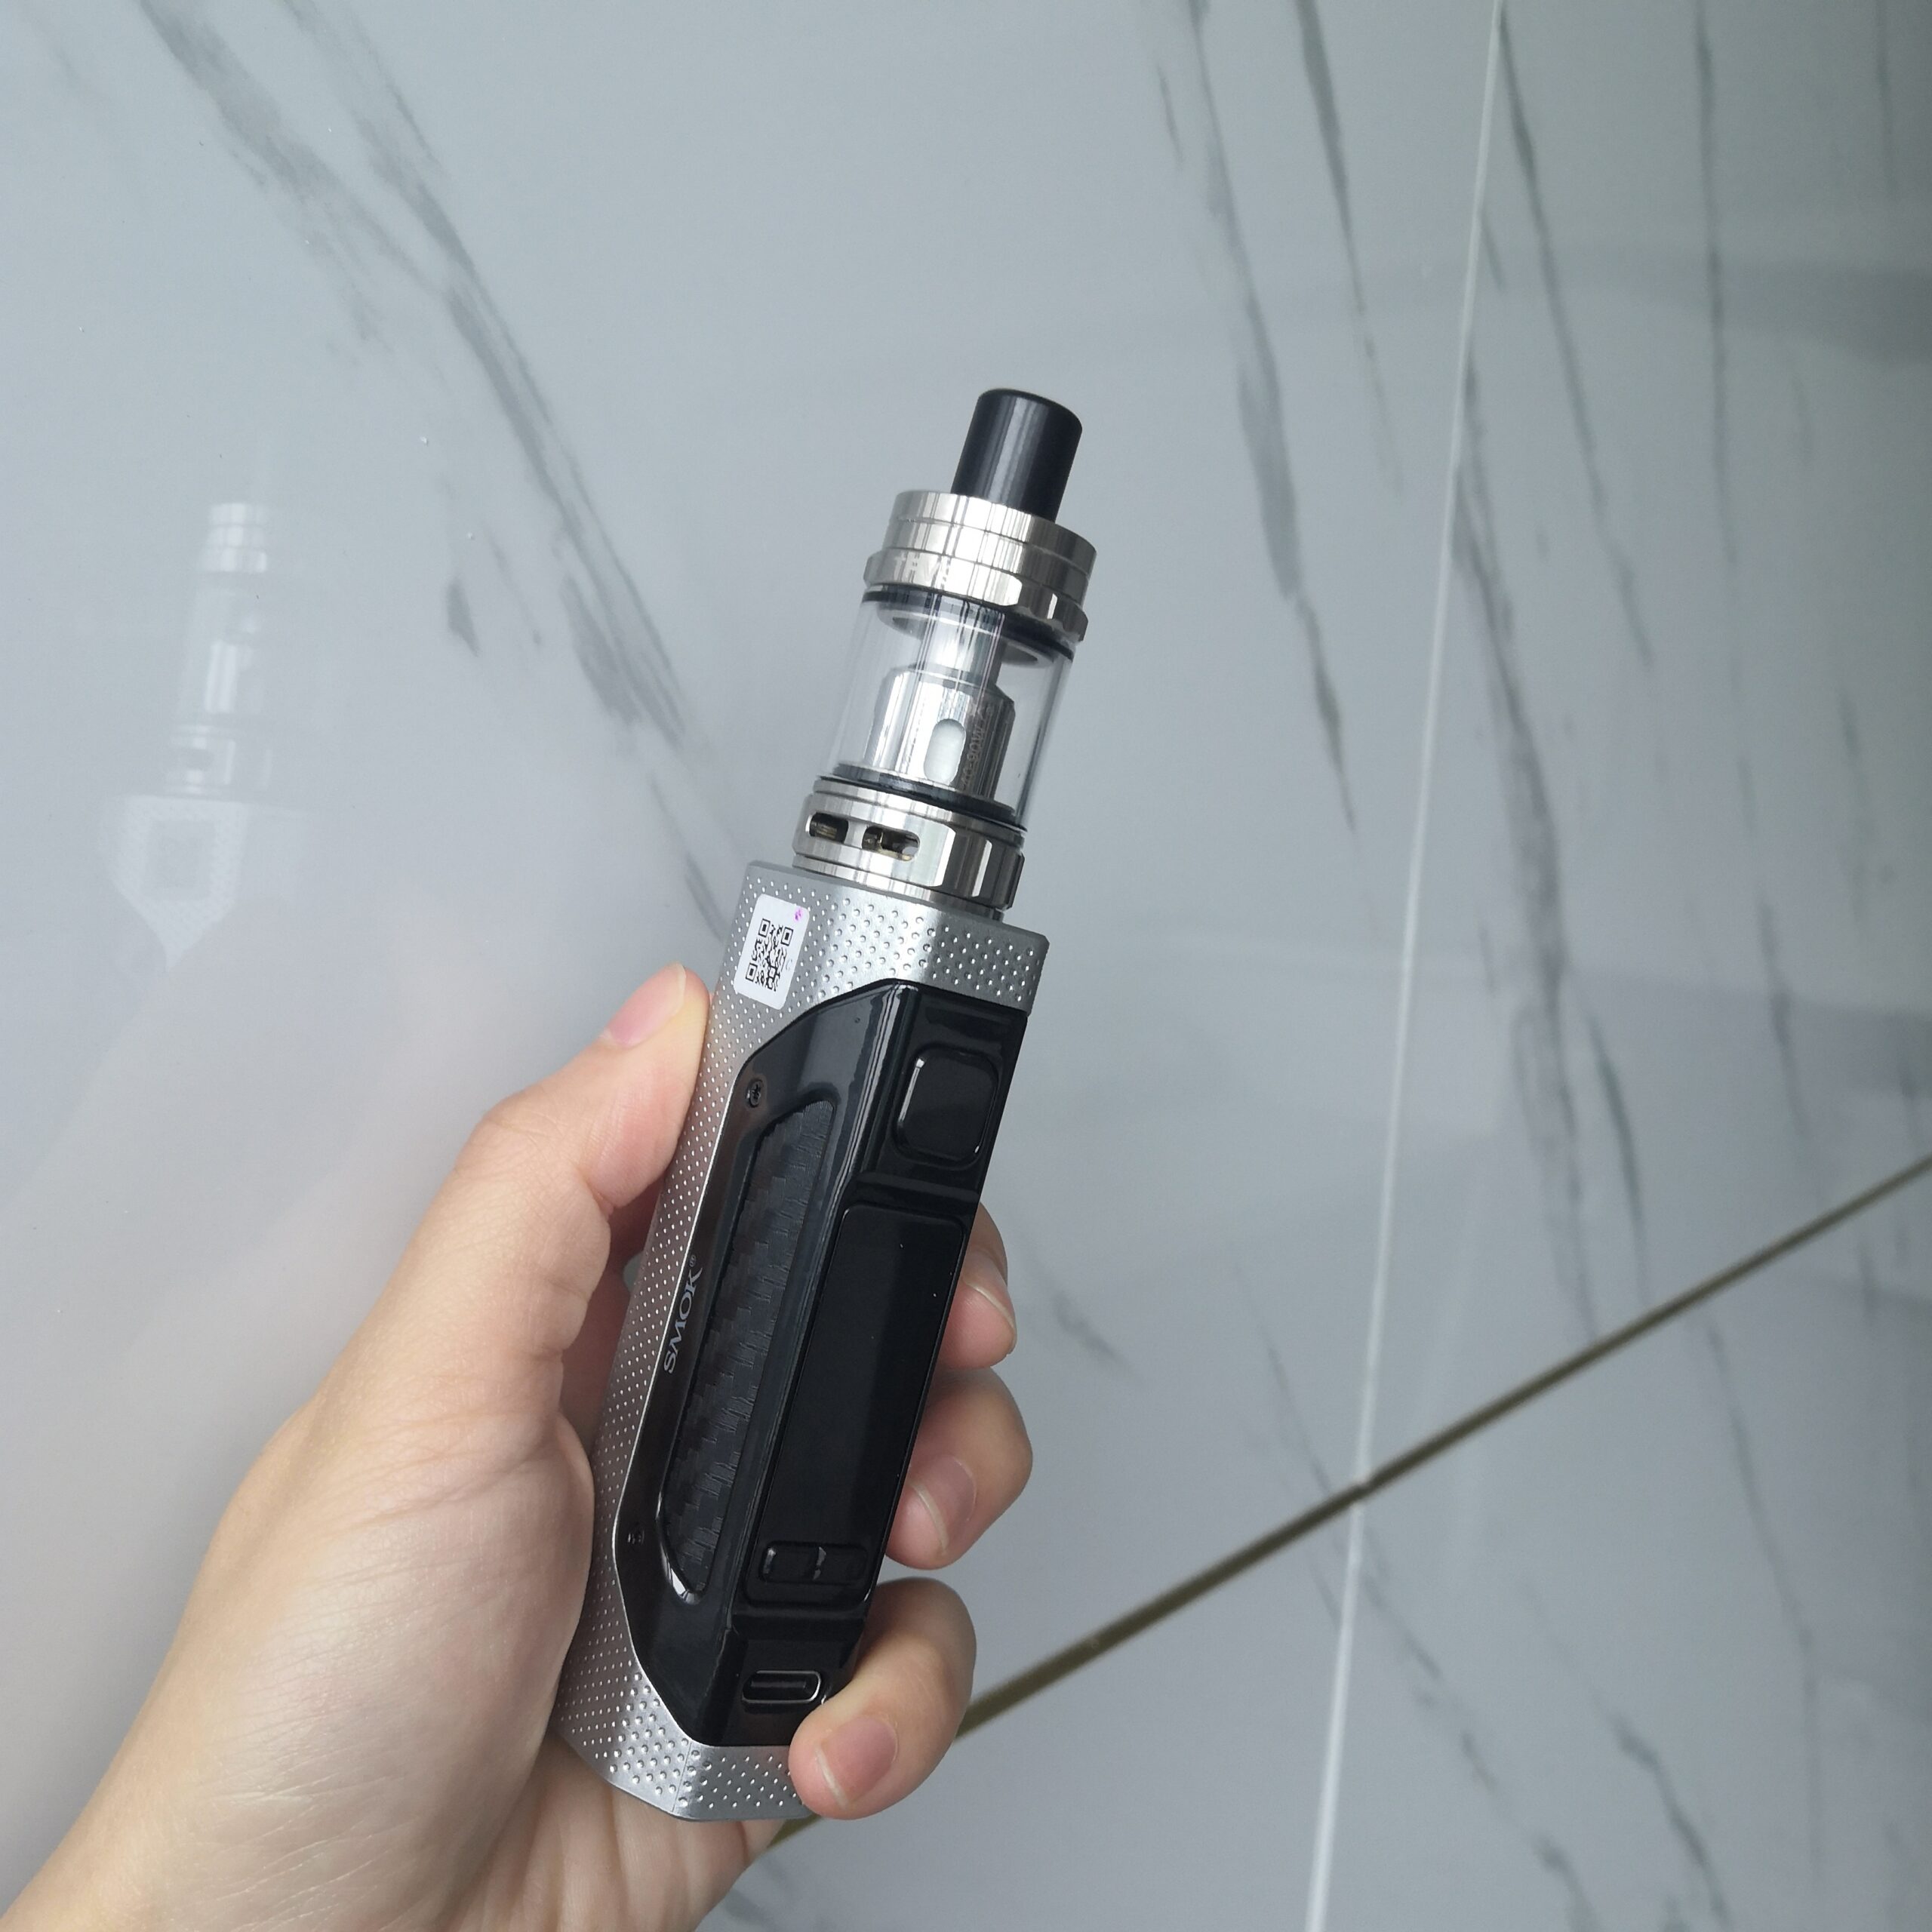
RIGEL MINI uses a spring loaded 510connector Please be certain that there is nothing betweentheMod and the attached atomizer.
1) Connect the atomizer to the device and tighten it clockwise.
2) After the device is powered on, please press the Fire Key to vape.
Mod Operations
1. Power on
While the device is off, quickly click the Fire Key 5 times in2 seconds to turn it on. The screensuccessively displays the product logo and version information, and then enters the maininterface.
2. Vaping
1) While the device is on, press and hold the Fire Key tovape (it will be forced to stop workingwhen the vaping time exceeds 8 seconds, release and press again to vape).
2) Quickly press the Fire Key 3 times to lock or unlock the vaping function.
3. Screen Unlocked Status
1) Press UP or DOWN Butto to choose your desired wattage;
2) Press UP and DOWN Button simultaneously to lock or unlock the wattage adjustment function;
3) Press the Fire key and DOWN Button simultaneously to clear the number of puffs.
4. Charging
When the USB cable is inserted, the charging interface will display the battery percentage.
5. Power Off
While the device is on, fast press the Fire KeyS times in 2 seconds to tumn it off. The screenuccessively displays “POWEROFF” and “SMOK”.
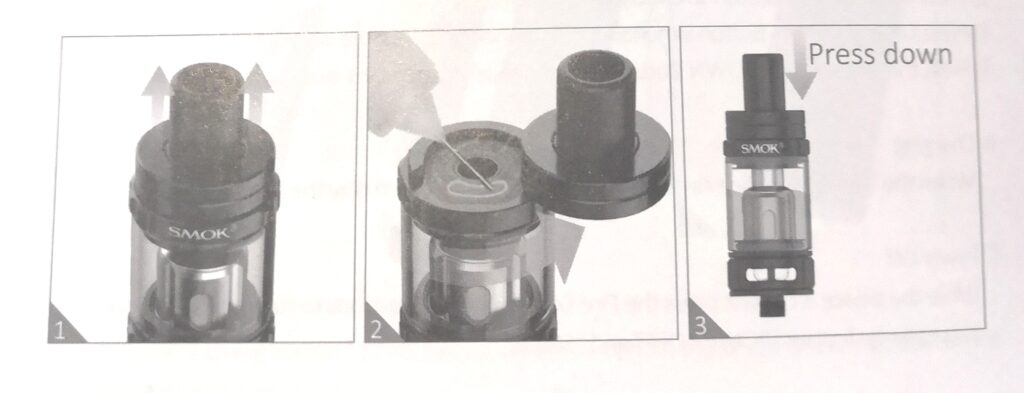
Opening and Closing instructions for Refilling and Eliquid Opening:
- Hold the tank with one hand. Lift the top cap and turn it counterclockwise to open the filling port.
- Insert the nozzle of an e-liquid refill container into the fill port, and pay attention to drop it into the central airflow tube.
Closing:
3. Lift the top cap and turn it clockwise firmlyuntil youheara “click’ sound.
*Do not inhale immediately after filling in the tank. Let it stand for several minutes to get the cotton completely saturated.
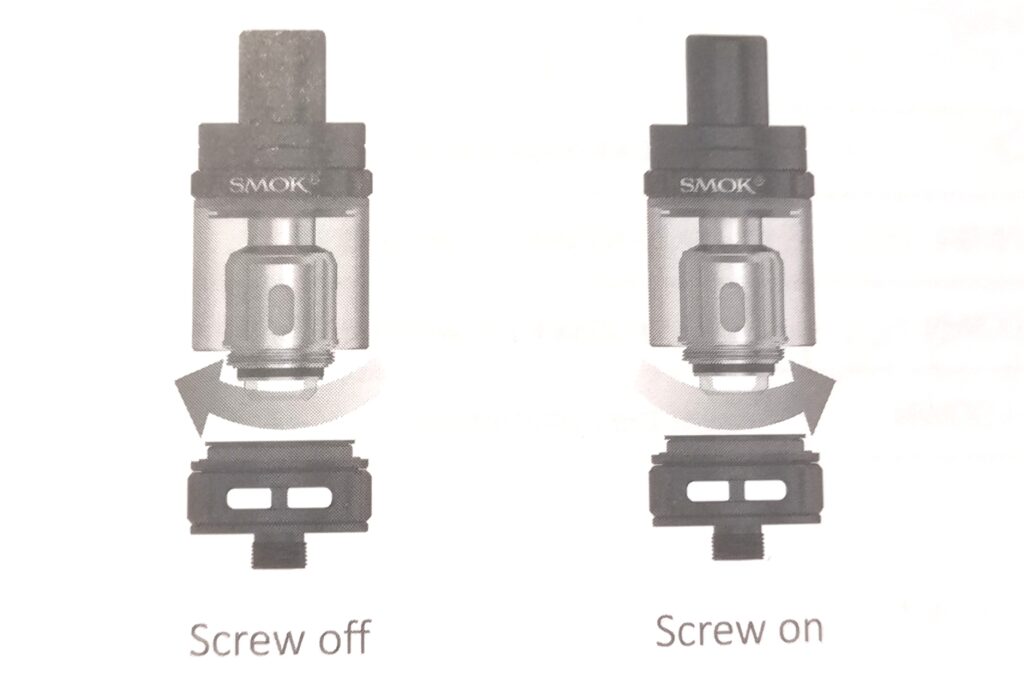
Opening and Closing Instructions for Replacing New Coil
- Unscrew the base, then remove the coil head from the top cap;
- Install the new coil and finally screw the base back on.
Control air input:
Rotate the bottom adjustable aiflow System to control air input.

Appendix1 Key Function
| Key | Function |
| Fire Key | Fast click 5 times in 2s- Power On/Off Fast click3 times – Lock or unlock vape Function Hold on- Vape |
| UP | Click to increase the wattage |
| DOWN | Click to reduce the wattage |
| UP + DOWN | Lock or unlock the wattage adjustment function |
| Fire Key + DOWN | Clear the puff number |
Appoendix 2 Screen Prompts
| Prompts | Details |
| BATTERY LOW | The batteryvoitage is lower than 33Vt01V before vaping. The batteryvoltage is lower than2 5Vt01V during vaping. |
| POWER OFF | The battery voltage is lower than3.1Vt0.1V |
| OHMS TOO LOW | The atomizer resistance is lower than 0.1002t5% |
| OHMS TOO HIGH | The atomizer resistance is higher than 25005% |
| NO ATOMIZER | Atomizer hasn’t been detected |
| ATODMIZER SHORT | Short circuit has been detected. |
| РСЕВА ТОО НОТ | The temperature of PCBAis too high and high temperature protections start. |
| TIME OVER | When the vaping time is longer than 8 seconds |
| WATTAGE LOCKED | The wattage adjustment functions loCked (You can change the wattage when pressing the UP/DOWN button). |
| POWWERLOCKED | The vaping function is locked (you can’t fIre it when locked), |


