Preparation before use
(1) Please make sure the battey you’re using corepond with the BTTERYWARNING CARD.
(2) Before vaping, please make sure the pod is flled with enough ejuice.
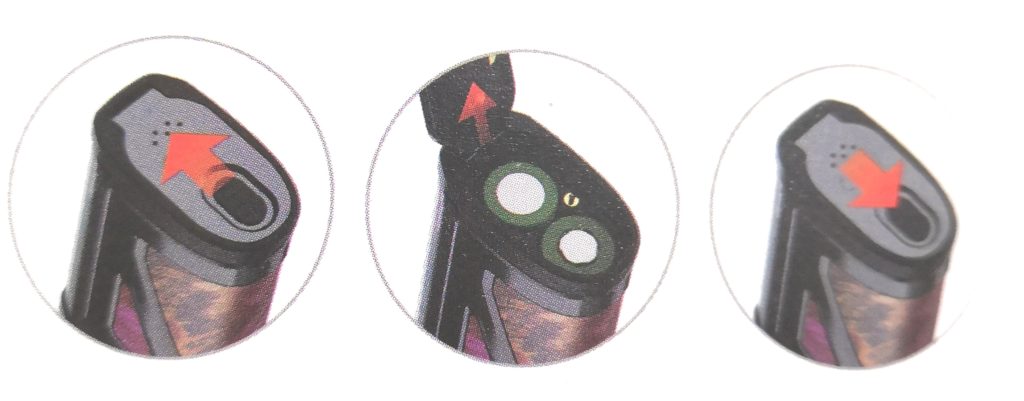
Battery Installation
(1) Slide and open the battery cover as the picture shows;
(2 )Place two 18650 batteries into the device according to the correct directíons;
(3) Close the battery cover.
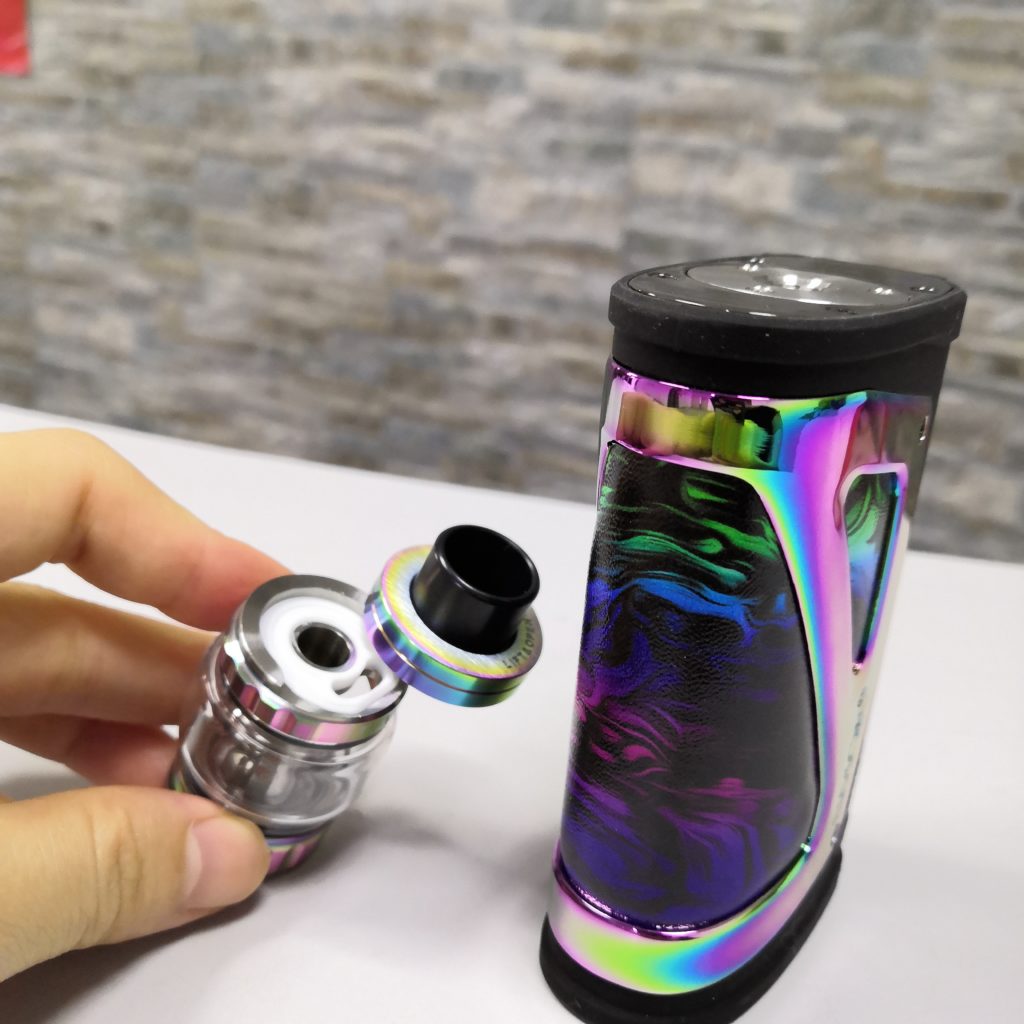
Attach Atomizer
SCAR-18 uses a spring loaded 510 connector. Please be certain thatthere is nothing between the Mod and the attached atomizer.
(1) Connect the atomizer to the device and tighten it clockwise.
(2) After the device is powered on, please press the Fire Key to vape.
Mod Operations
1. Power on
While the device is off, quickly dick the Fire Key5 times in 2 seconds to turn it on.
2. Vaping
While the device is on, press and hold the Fire Key to vape (it will be forced to stop working when the vaping time exceeds 8 seconds, release and press again to vape).
3. Button features
(1) Press the UP and DOWN buttons simuitaneously to lock or unlock thewattage adjustment function;
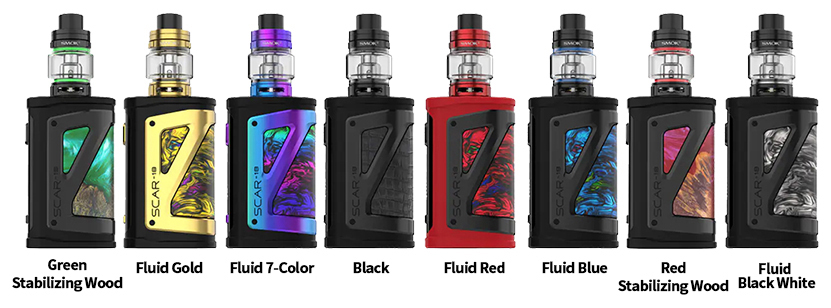
(2) Press the Fire Key and UP button simultaneously to switch between thesix theme colors;
(3) Press UP or DOWN Button to adjust the temperature or wattage settings.
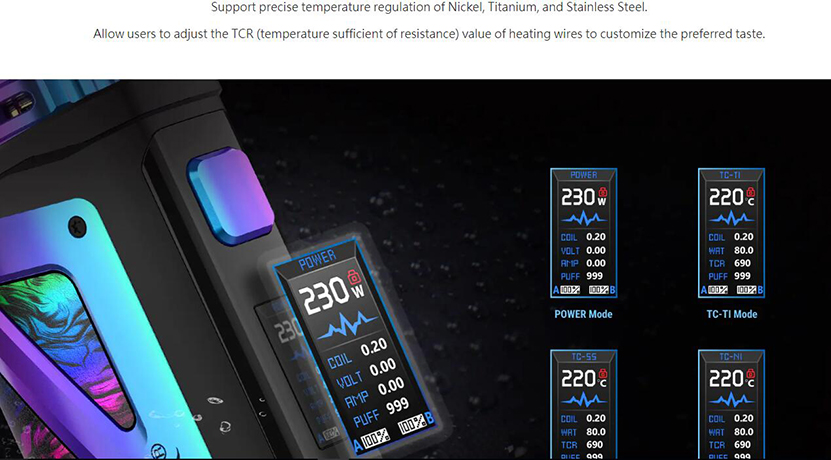
4. Menu Settings
Press the Fire Key 3 times to enter menu setting interface; press the UP/DOWN Button to switch between “POWER”,”TC-TI”,”TC-Nl” and”TC-SS”.
- POWER MODE
Press the Fire Key to select the item tobe adjusted.
COlL: set the atomizer resistance, range-t100mQPUFF.dear the number of puffs.
- TC MODE (TC-NI/TC-TI/TC-SS)
Press the Fire Keyto select the item to be adjusted.
COIL set the atomizer resistance, range ±100mΩ
WATT: set the Tc preheat power, range: 10W-230W
TCR: set the temperature coeffcint of resistance, range: N: 400-800T:200-500, SS: 10-300
PUFF: clear the number of puffs
5. Power Off:
While the device is on, quickly press the Power Button 5 times in 2 seconds to turn it off. The screen displays “POWRE OFF”.
Tank Operation
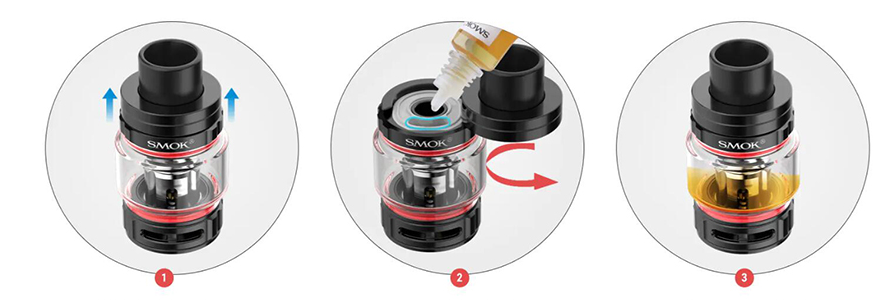
How to fill with e-liquid:
(1) Hold the tank with one hand, lift and open the top cap.
(2) Add e-liquid through the slot and pay attention not to drip it into the central airflow tube.
(3) Close the cap carefully and firmly. Then let it stand for several minutes to getthe organic cotton completely saturated.
Replace atomizer core:
First, unscrew the base, then unscrew the coil head from the base, thensecure your new coil head onto the base plate (ensure that itis screwed insecurely), finally screw the new coil head into the chimney and you’re readyto prime your new coil head.
Control air input:
Rotate the bottom adjustable airflow system to control air input.
Appendix1 Key Function Table
| Key | Function |
| Fire Key | Fast click5 times in 2s- Power On/Off Fast click 3 times in 2s- Menu ChooseHold on- Vape Hold on-Vape |
| UP | Click Down- Increase the temperature (TC Mode)Click Down- Increase the wattage (VW Mode) |
| DOWN | Click Down- reduce the temperature (TC Mode)Click Down- reduce the wattage (VW Mode) |
| UP + DOWN | Lock or unlock the wattage adjustment function |
| Fire Key+UP | Adjust theme color |
| Fire Key + DOWN | Clear the number of puffs |
Appendix 2 Screen Prompts Table
| Prompts | Details |
| “SMOK” | Power on successfully |
| “POWEROFF” | Power off successfully |
| BATTERY LOW | The battery voltage is lower than3.2Vt0.1V before vaping |
| OHMS TOOLOW | Low resistance value (<0.100+5% inVW; <0.05Qt5% in TC) has been detected,replace atomizer |
| OHMS ToO HIGH | High resistance value (>2.500+5% inVW; 2.000t5% in Tc) has been detected,replace atomizer |
| NO ATOMIZER | Atomizer hasn’t been detected |
| NEW COIL?OLD/NEW | It shows when you change the atomizer |
| ATOMIZER SHORT | Short circuit has been detected |
| PCBA Too HOT | The temperature of PCBAis too high, and high-temperature protection starts |
| TIME OVER | Vaping time exceeds 8 seconds |
| WATTAGELOCKED | The wattage adjustment function is locked (you can’t change the wattage when pressing the UP/DOWN button) |
| WATTAGEUNLOCKED | The wattage adjustment function is unlocked |