


Thank you for choosing IJOY! Please read this manual carefully to ensure proper use. For additional information regarding this product or its use, please consult your local IJOY retailer or visit our website www.ijoycig.com
iJoy SHOGUN UNIV 180W TC Box Mod Introduction
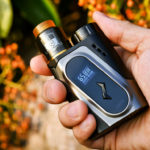
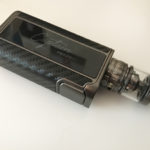
The SHOGUN UNIV BOX MOD is a compact sized, dual 18650 mod that utilizes a stylish streamlined design highlighted by exquisite artistry and workmanship. The SHOGUN UNIV MOD can reach the beastly power of 180W output and integrates multiple vape modes including POWER, POD, PMODE, and TEMP modes for a very capable and versatile platform. The UNIV chipset coms complete with a full suite of safety protections and is compatible with dual high drain 18650 batteries for long-lasting vape life. The SHOGUN UNIV is manufactured using solid and textured materials as well as featuring beautiful double-sided resin for a high-end appearance.
iJoy SHOGUN UNIV 180W Includes:
1 * SHOGUN UNIV MOD(180W) 1 * USB cable
1 * Manual 1* Warranty Card
Specifications:
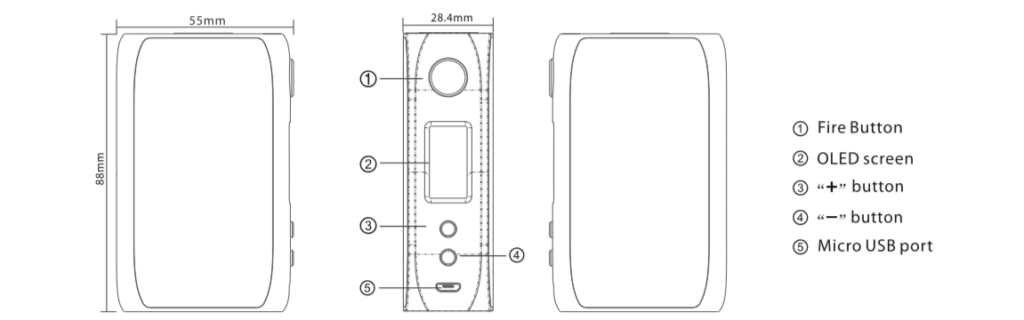
Size: 88*55*28.40mm
Screen: 0.96 Inches
Battery:2 x 1 8650 batteries (NOT included) Power Range: 5-1 BOW
Resistance Range: 0.05-3.0ohm Temperature Range: 300-600’F/149-3 16℃
Output Current: 0-45A
Materia l: Zinc Alloy & Resin
TCR function
No overhang with 28mm tanks
Support firmware update with USB cable
Unique Custom User Mode
iJoy Shogun Operation Instruction:
1, Power on/off
Press the fire button 5 times in quick succession to turn the device on and off. After switch on, OLED display “SHOGUN” logo and software version number at standby mode.
(Note: Please adjust the wattage to a proper range to match the atomizer before using)
2.Vaping
While the device is power on, just keep pressing the fire button to activate vape
(Firing timeout: 10 S)
3. General Functions
To Get to the Main Menu
Press the fire button 3 times within 2s to enter into the main menu. Press the up/down buttons to switch among different functions. Press the fire button to confirm.
4. Power Mode
In the main menu, press the up/down button to switch to “” icon, press fire button to confirm. Press up/down menu buttons to switch among below 4 modes. In user mode, press fire button to switch among each setting columns. Press up/down menu buttons to adjust the wattage. After setup is completed. Press fire button to switch to “EXIT”. Press fire button to confirm.
Norm Mode: Maintains the currently set power.
Hard Mode: 30% higher than the currently set power.
Soft Mode: 20% lower than the currently set power.
User Mode: Customize the power output for the first three seconds of each puff. With each setting column representing half a second.
5. Pod Mode:
Press the fire button 3 times within 2s to enter the main menu.
Press the up/down menu buttons to switch to “Pod” icon, press the fire button to confirm, under the mode of “POD”, the voltage range is adjustable from 2.5-3.8V.
6. Power Mode:
Press the fire button 3 times within 2s to enter the main menu.
Press the up/down menu buttons to switch to
7. TEMP Mode
NI/TI/SS/TCR M1/TCR M2
In the main menu, switch to “T” icon, press fire button to confirm.
Press up/down menu buttons to switch among NI/TI/SS/M1/M2 modes. Press fire button to confirm. Press up button, when “W” flashing, press up/down menu buttons to adjust wattage. Press down button, when “F” or “C” flashing, press up/down buttons to adjust temperature value.
The Temperature unit will cycle between “F” and “C” when the minimum or maximum temperature is reached.
In the temperature control mode to replace the heating wire, when the new heating wire resistance and the previous heating wire resistance greater than or equal to 0.2ohm, the screen appears the following tips.
Press “+” to choose and confirm new coil.
Press “-” to choose and confirm the same coil.
8. TCR Mode (M1,M2)
With the TCR (Temperature Coefficient of Resistance) function available. You can customize your temperature control coils (NI,TI,SS) on your own, in the main menu, switch to “TCR” icon,press fire button to confirm, switch to M1/M2 modes, press the fire button to confirm.
How to set the TCR?
In the main menu, switch to “TCR” mode indication, press fire button to confirm. Press fire button to choose between TCR M1, TCR M2, press up/down menu buttons to select certain parameter. After setup is completed, press fire button to “EXIT”. Press up/down menu buttons to confirm.
9. Puff Counter
In any mode, the screen shows the number of puff. If a puff more than 0.8s, it will be recorded as one puff. The default number is “0000”. When the number reaches “9999”, it will be cleared automatically.
How to Clear the Puff Value Manually?
Press the fire button 3 times within 2s to enter the main menu.
Choose “SET” icon, use up/down menu buttons to enter “PUFF RESET”, press the fire button to confirm.
10. How to calibrate the resistance?
When the device connected with a new atomizer, press up/down menu buttons at the same time to calibrate the initial resistance of the new atomizer. We recommend to calibrate resistance in temperature control mode, you can make the temperature control more accurate, please note that this operation requires heating wire coiling room temperature.
11. Set Standby Mode
Press the fire button 3 times in 2s to enter the menu, choose “SET icon, use up/down menu buttons to choose “Screen Time” area there are 4 preset choices, press fire button to confirm your choice, the screen will enter standby mode at the selected time.
12. Upgrade Operation
Enter http://www.ijoycig.com, move to the “Support” part, and click “Software”, choose “BOX MOD”, find out “IJOY SHOGUN UNIV MOD“ and “IJOY Update Installer” and download them. Install “IJOY Update Installer” to the computer desktop.
Take out the batteries
Keep pressing the fire button, connect the device to the computer via USB cable, after the computer screen shows “”icon, release the fire button.
4.Open the “IJOY Update” software, click “Choose” and find “Shogun_v1.4.dfu” in the “IJOY SHOGUN UNIV MOD” and click it.
Press “Update” .”Update Successfully” will be displayed. The update is completed.
If you have any problems, please operate the above 2-4 steps again.
13. How to Charge by USB?
When one of the batteries voltage is below 3.3V, the display will show “Low Battery”, then you need to charge the device. Please connect the device through the USB cable to the computer or power adaptor.
- During the charging process, the battery energy column indicator will scroll; When fully charged, it will stop scrolling.
(If the device will not be used for a long time, please charge every 30 to 60 days to make sure battery healthy and keep the life of the battery,) - Malfunction
Indications and Protections - PCS TEMPERATURE OVERHEAT PROTECTION: When the temperature is too high, the output will shut off automatically and the screen will display “PCS TOO HOT”.
- LOW POWER ALERT: When one of the batteries voltage is below 3.3V, the device shows “LOW BATTERY”.
- PCS ATOMIZER SHORT:
CIRCUIT PROTECTION: When atomizer short-circuit occurs, the OLED screen will display ”SHORTED”. - NO ATOMIZER: When no atomizer is connected, the device will display “NO ATOMZIER”.
5.LOW RESISTANCE PROTECTION:
When the resistance is lower than 0.05ohm, the OLED screen will display ”OHM TOO LOW”.
When the resistance is higher than 3.0ohm, the OLED screen will display “OHM TOO HIGH”.


Is their anyway to adjust the screen brightness just bought one today and the screen is so dim u can hardly see it, especially in the sunlight u can’t c anything at all… thanks..
I have the same problem, I cant work out how to adjust it.
Setting screen brightness is not supported in this kit.
My mod is about a month old. Today the down button stopped working! Any ideas on how to fix it? Can’t adjust wattage without it stuck on 180w???
Hi, friend, we recommend that you go to the seller for help, and there is a warranty period.
Mine is stuck on 83.9. Neither up or down buttons work
Perhaps both up and down button are broken. We recommend you to ask the seller for help.
I have a solution!! There’s very little chance that you’ll see this now that it’s been 6 months or so, but maybe it can help someone else fumbling through the internet– This same thing happened to me when I was heading back home on a road trip from Florida, I ended up buying a new VooPoo Drag 2 because of it…
HOWEVER, when I got home, I plugged the mod into the computer and ran the firmware updater – flashed the firmware again and it was factory reset, good as new. I haven’t had any issues with it since…
I still use the mod today as I prefer it overall to the Drag, granted, the Drag does seem to have noticeably better battery management (same batteries last longer, less leak somehow) … I’ve had the iJoy Univ for at least a year longer and aesthetically it’s held up much better, whereas the Drag looks like I ran sandpaper over the paint… Functionally, a mod is a mod to me anymore. As long as it does what it’s supposed to, I’m really not sure what more I can ask of it.
Hola DrFappingston, me podrias compartir el firmware ya que no esta disponible en la pagina oficial
Does the wattiage cycle back through if you only use one adjuster. I have a broken button but still want to adjust the wattage. If i only use the top button will it cycle back down to the lowest voltage?
The top button only can confirm the wattage, and it can’t let it cycle back down to the lowest voltage. As you said that you have one broken button, but you can use the other normal button to adjust the power you want.
My top button is broke and I am unable to adjust the wattage to 80, it will only go down. How do I adjust the wattage back to 80 without havent to go through any major pain of having to send it back to iJoy? I have been to the seller and they dont know what to do.
Sorry to reply late. In this case, we recommend you to press the “-” button for a long time to reduce to 80w.
I had my bottom button ‘break’ as well when I was heading home on a roadtrip and ended up buying a new mod… but when I got home, I plugged the iJoy into the PC and flashed the firmware with iJoy’s software and it factory reset and has been good as new since… I still use it today, I bought a Voopoo Drag, but aside from battery management, I much prefer the iJoy.
Neither up nor down buttons work.
My screen doesnt go on, it still fired but not both isnt working.
No fire even if batteries are charged, No screen indication
please assist on how to fix
Please send an email to the service@ijoycig.com (After-sales service)
Is there a way to factory reset the unit? As in the unit will power on as if it was brand new and allow the user to plug in new adjustment settings such as wattage when an up or down button has failed?
This product cannot be restored to factory settings。
I cant vape or open menu I can’t do anything because If i press anything on the screen show “unlock + and -”
Help
Maybe your mod screen is locked, and you can try to pressing “+” and “-” button at the same time to unlock the screen.
How do I unlock this?
You can try to press”+” and “-” button at the same time.
I just purchased a new Shogun tonight. I purchased the exact model again because I liked my first Shogun so much. However, the screen on my newest Shogun is significantly lighter and I really can’t see to set it up. I know the screen can get brighter because of my last one. How can I get the letting dark enough for me to see? I literally can’t make out anything on the screen.
Sorry, it is unable to adjust screen brightness.
Hi there my batteries are running out at different speeds and has only become a recent problem, is there anyway I can get them to work together again because it dies so quickly as once one dies it stops working
Sorry to reply late.
Maybe it’s time to replace the new batteries because the battery you use is broken.
My ijoy shogun is reading batteries incorrectly is this fixable with update?
Sorry for replying late. In this case, you can try to update your device or replace new batteries.
Hello, i had mine for atleast half a year now then suddenly it won’t turn on nor display anything even if i ised newly charged bat or connect it to a achrger or pc, how do I fix this since the warranty is not applicable anymore, thanks
Sorry for the reply late, we recommend that you can try to replace the new battery.
Sorry for the reply late, my friend, we recommend that you can try to replace the new battery.
Sorry for replying late, my friend, and we recommend that you can try to replace the new battery.
Hi! i need help. The mod wont recognize battery B, therefore it says low battery when pressing the fire button. If i plug in the charger, the charging screen won’t come up. Is there any way of fixing this issue or should I invest into a new mod?
Did you use the dual 18650 batteries? The mod is only powered by dual 18650 cells.
Hey so I am trying to charge my batteries. the screen shows two flashing batteries with question marks in it. what does this mean?
Have you put the right dual 18650 batteries inside the box mod?