


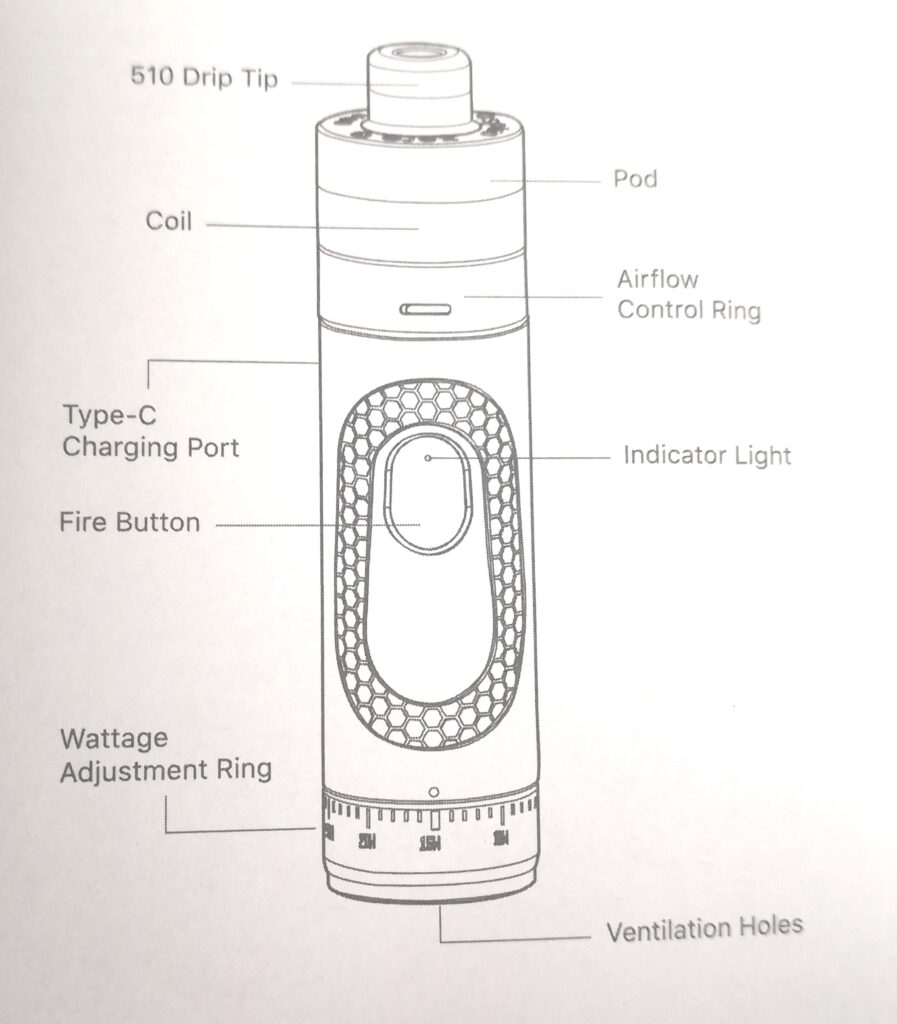
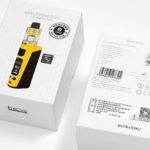
Today, let’s talk about the operations of latest released kit-Zero.G device.
| Status of indicator light | Device |
| Flash white 3 times | Click the fire button 5 times quickly to turn on or off |
| Green | Battery level > 3.8V (50-100%) |
| Blue | Battery level = 3.5~ 3.8V (20-50%) |
| Red | Battery level < 3.5V (0-20%) |
How to adjust the wattage output
It is very easy to adjust the output wattage. Just twist the adjustment ring located at the bottom of the device. Align the reddot with the output wattage value of your choice.
Protective Features
| Vaping Over-Time Protection (10s) | The LED light will flash purple 10 times |
| Short Circuit Protection | The LED light will flash purple 3 times |
| Low Voltage Protection | The LED light will flash red 15 times |
| Overcharge Protection | The device will stop charging |
| Overheat Protection | The LED light will stay yellow for 3s and then the device will cut off |
Charging Instructions
| Maximum charge current | 1A |
| Recommended charge voltage | 5V |
| LED Light flashes green 20 times | Fully charged |
| LED light flashes red 3 times | Attach the type-C cable |
| LED light flashes green 3 times | Unplug the type-C cable |
Note:
When installing a new coil, let the pod stand for 5minutes after flling so the cotton is saturated withe-liquid before use.
Do not let the pod become completely empty. Refill the pod to avoid dry burning or damage to the coil.
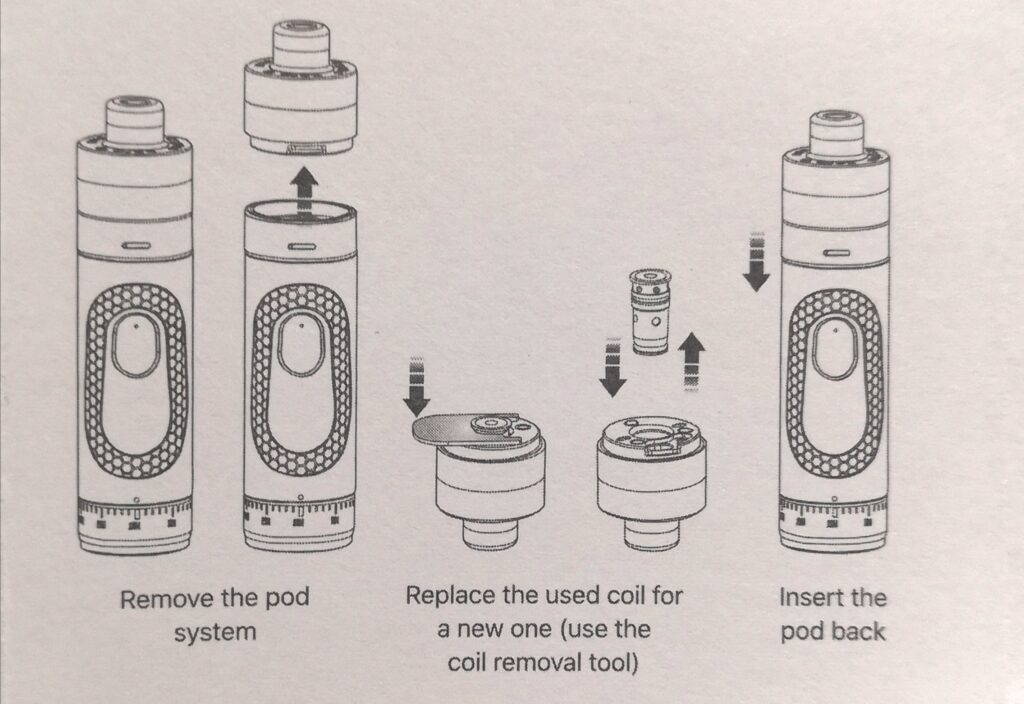
Coil Installation:
Pod Filling

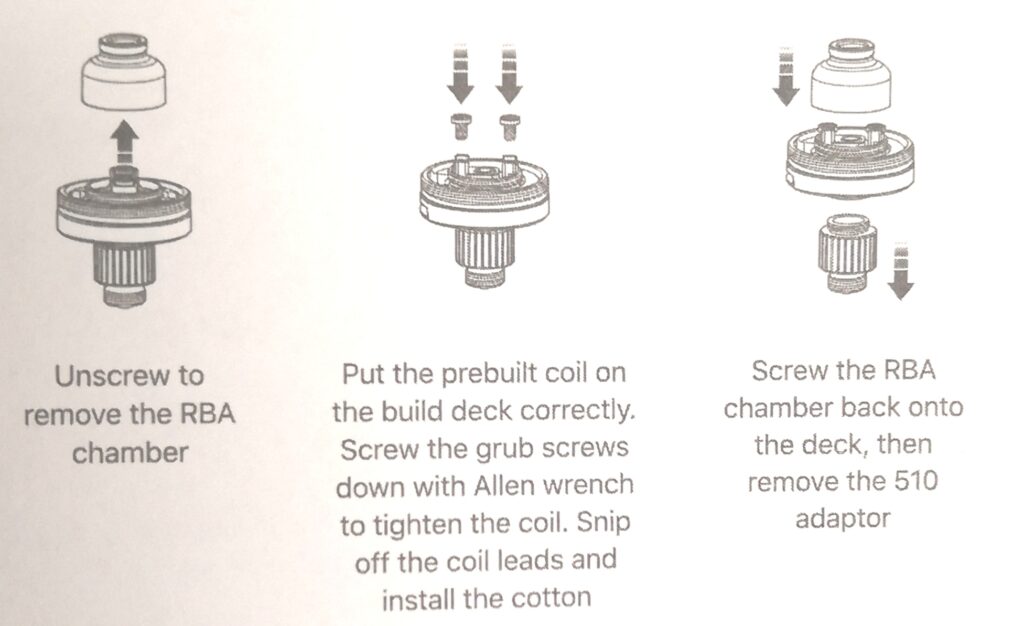
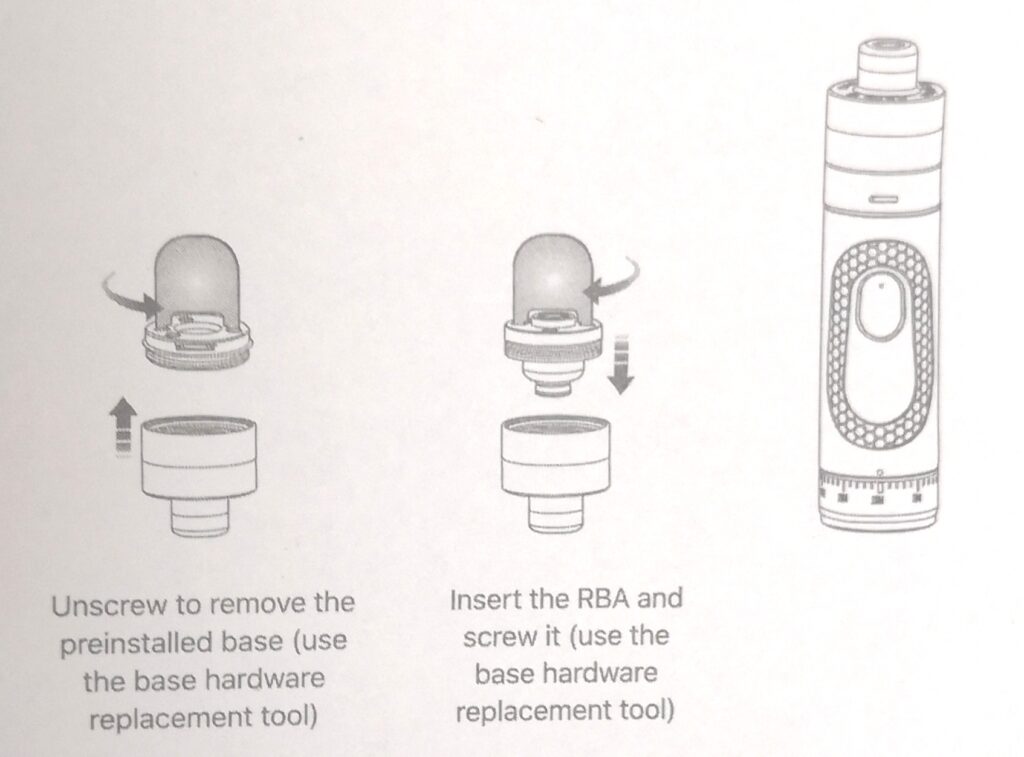
RBA Build Instruction
In the last of the post, let’s watch the video of Aspire Zero.G Kit

Preparation before use
(1) Please make sure the battey you're using corepond with the BTTERYWARNING...

This time, let's talk about the latest hot arrivals— Drag X and Drag S. It's known...
Notice for Use:
Thank you for choosing Joyetech. Please read this manual carefully before use lo ensure...
Revvo tank
Tank Features
• Ultra Convenient Top Fill
• Adjustable airflow
• 3.6ml capacity
•...