How to Use:
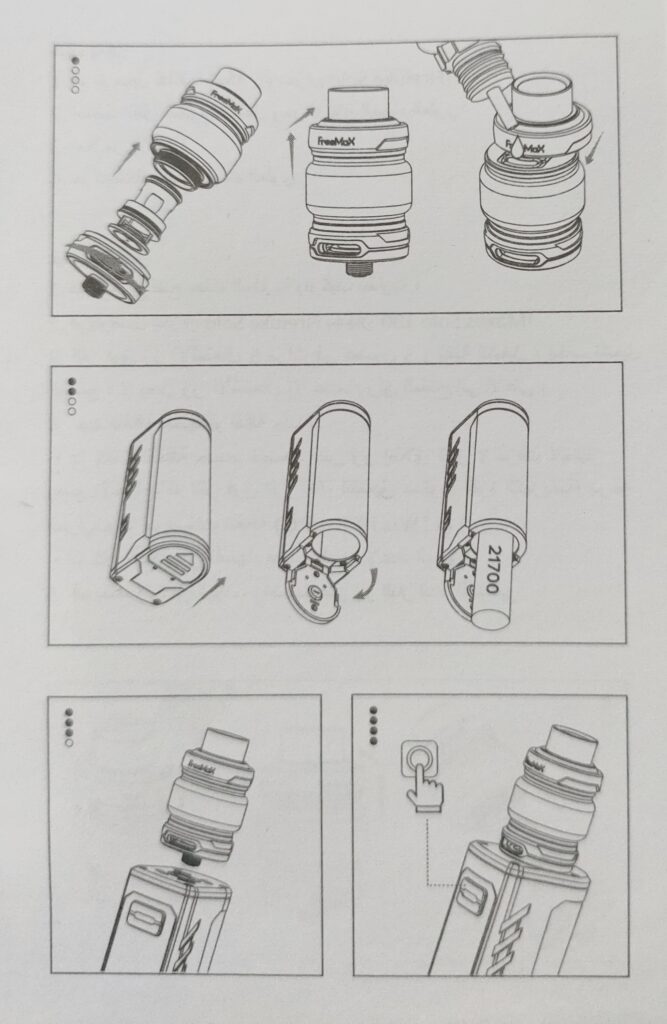
1. Slide to open the battery cover and install a battery;
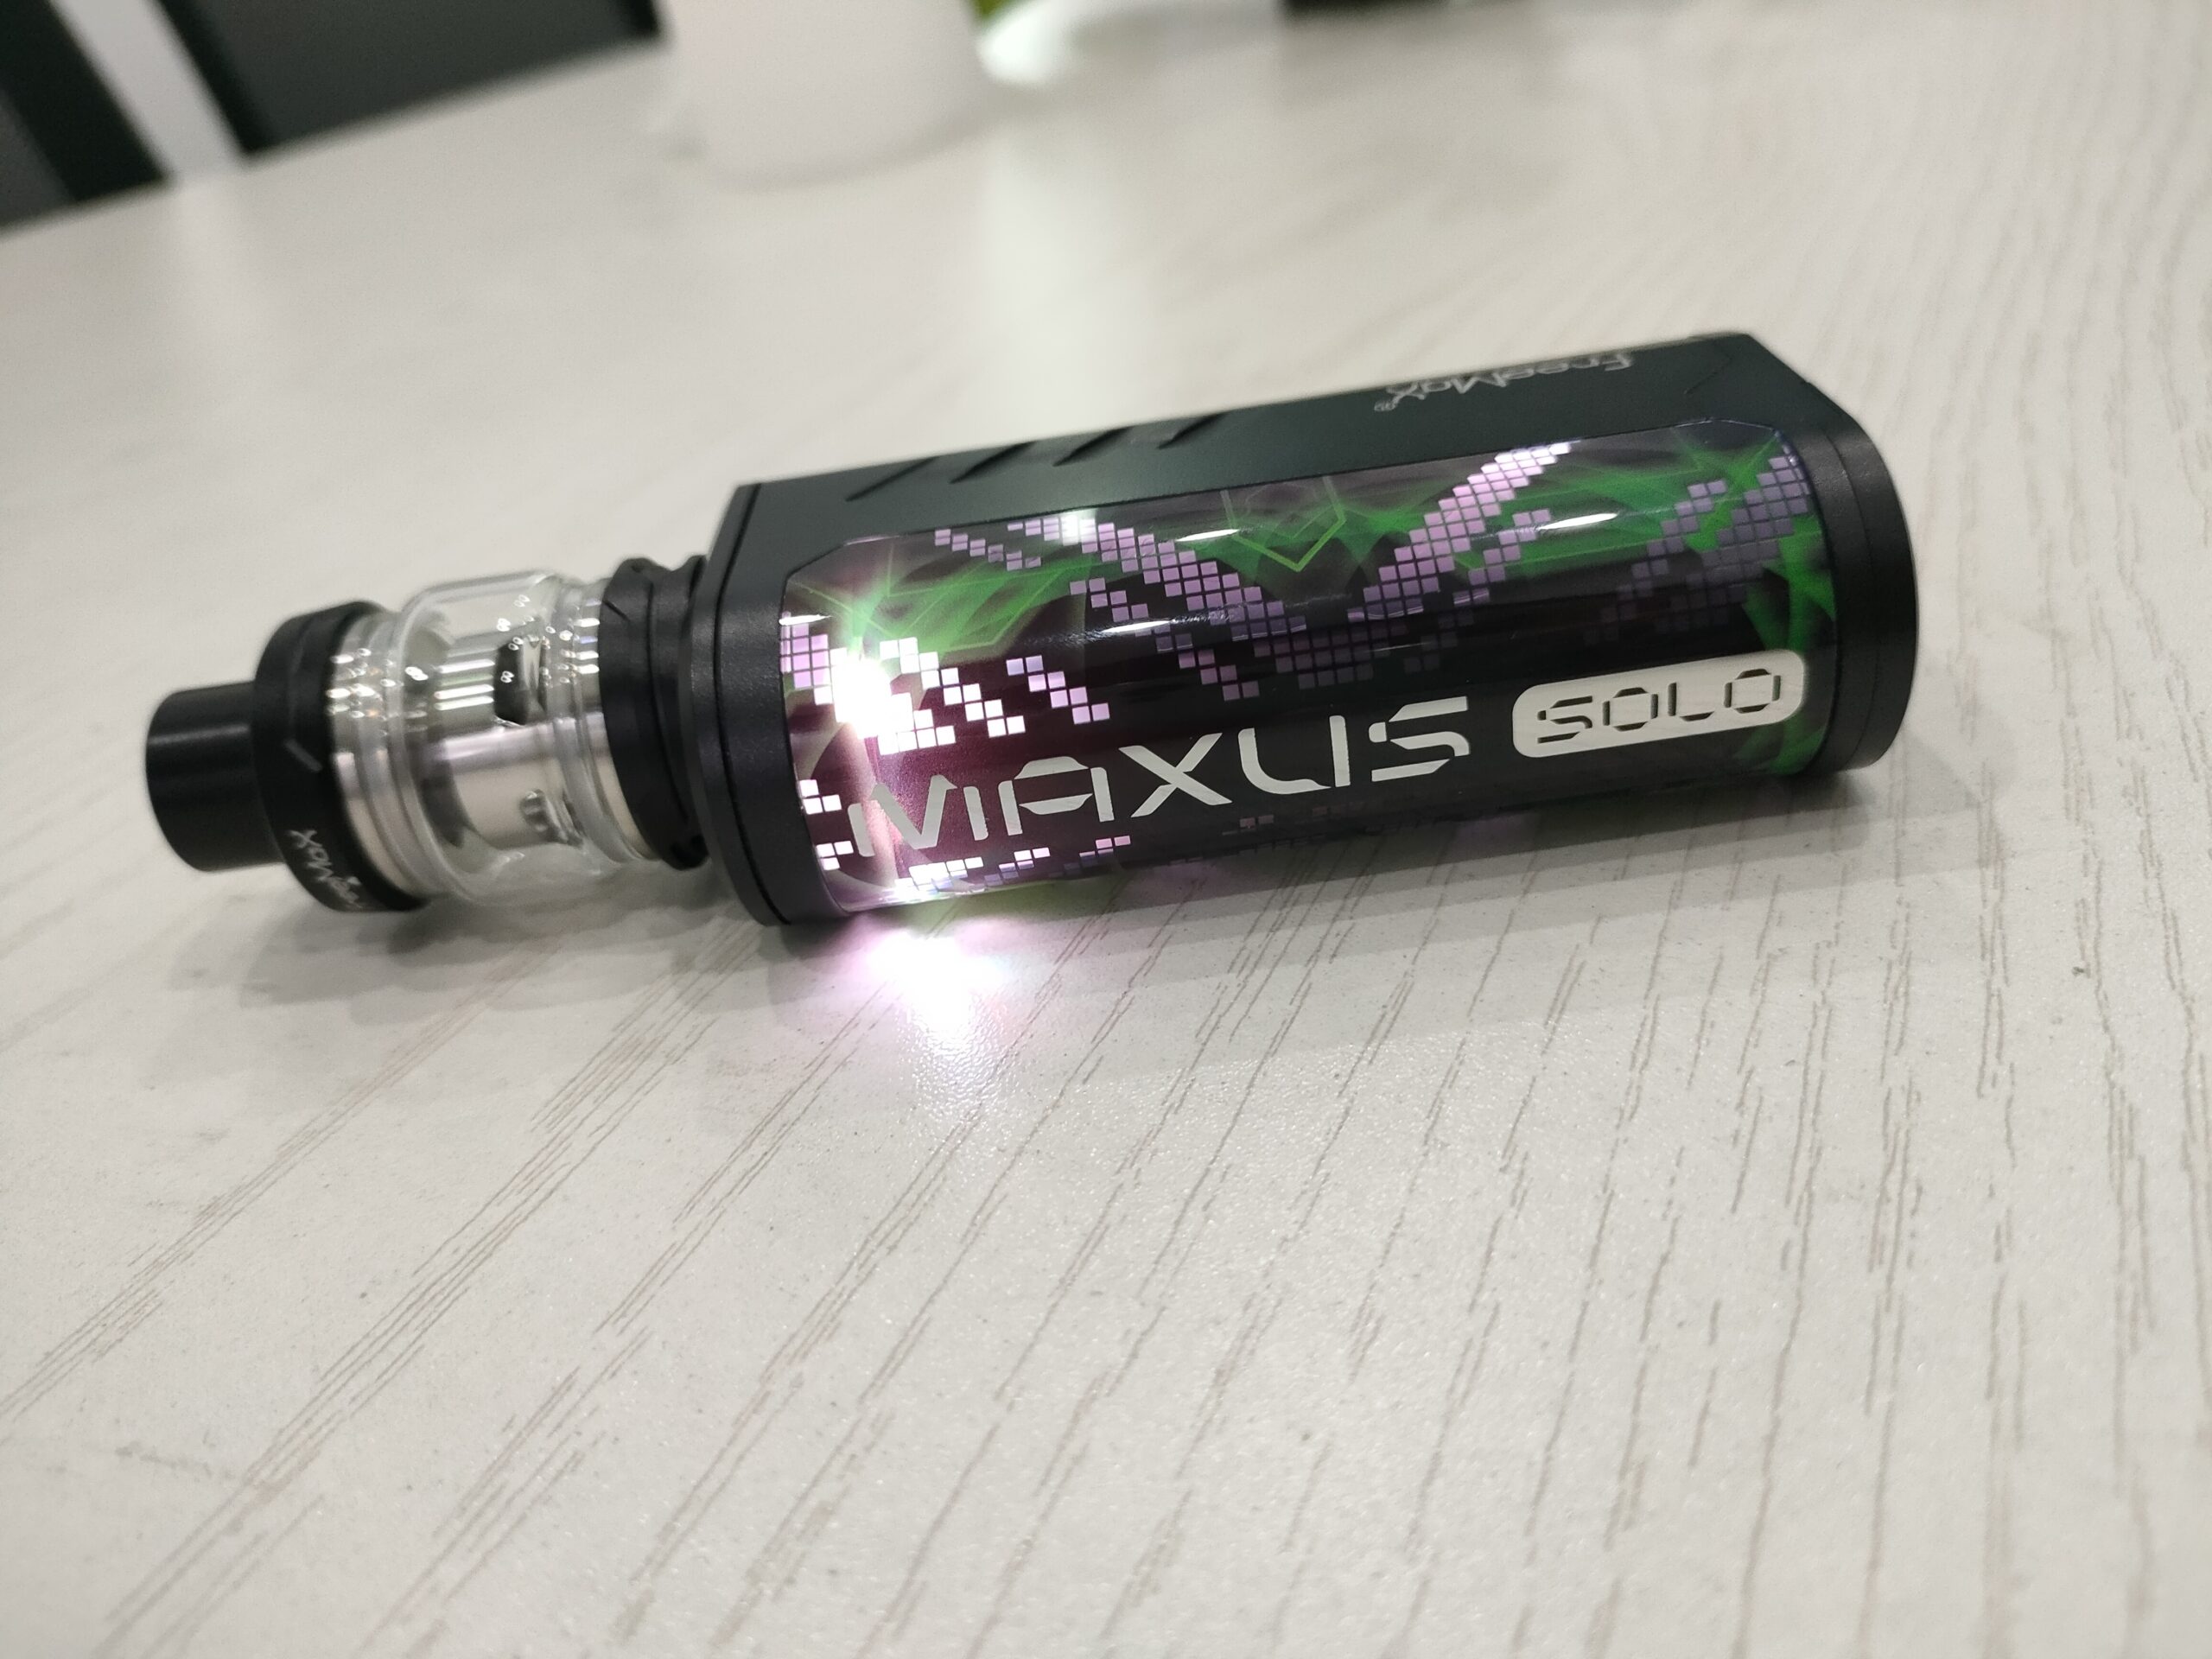
2. Connect Fireluke Solo Tank to Maxus Solo 100W Mod;
3. Click the fire button 5 times within 1,5s to turn on/off the mod: The fire button only works when the switch is slid to the top;
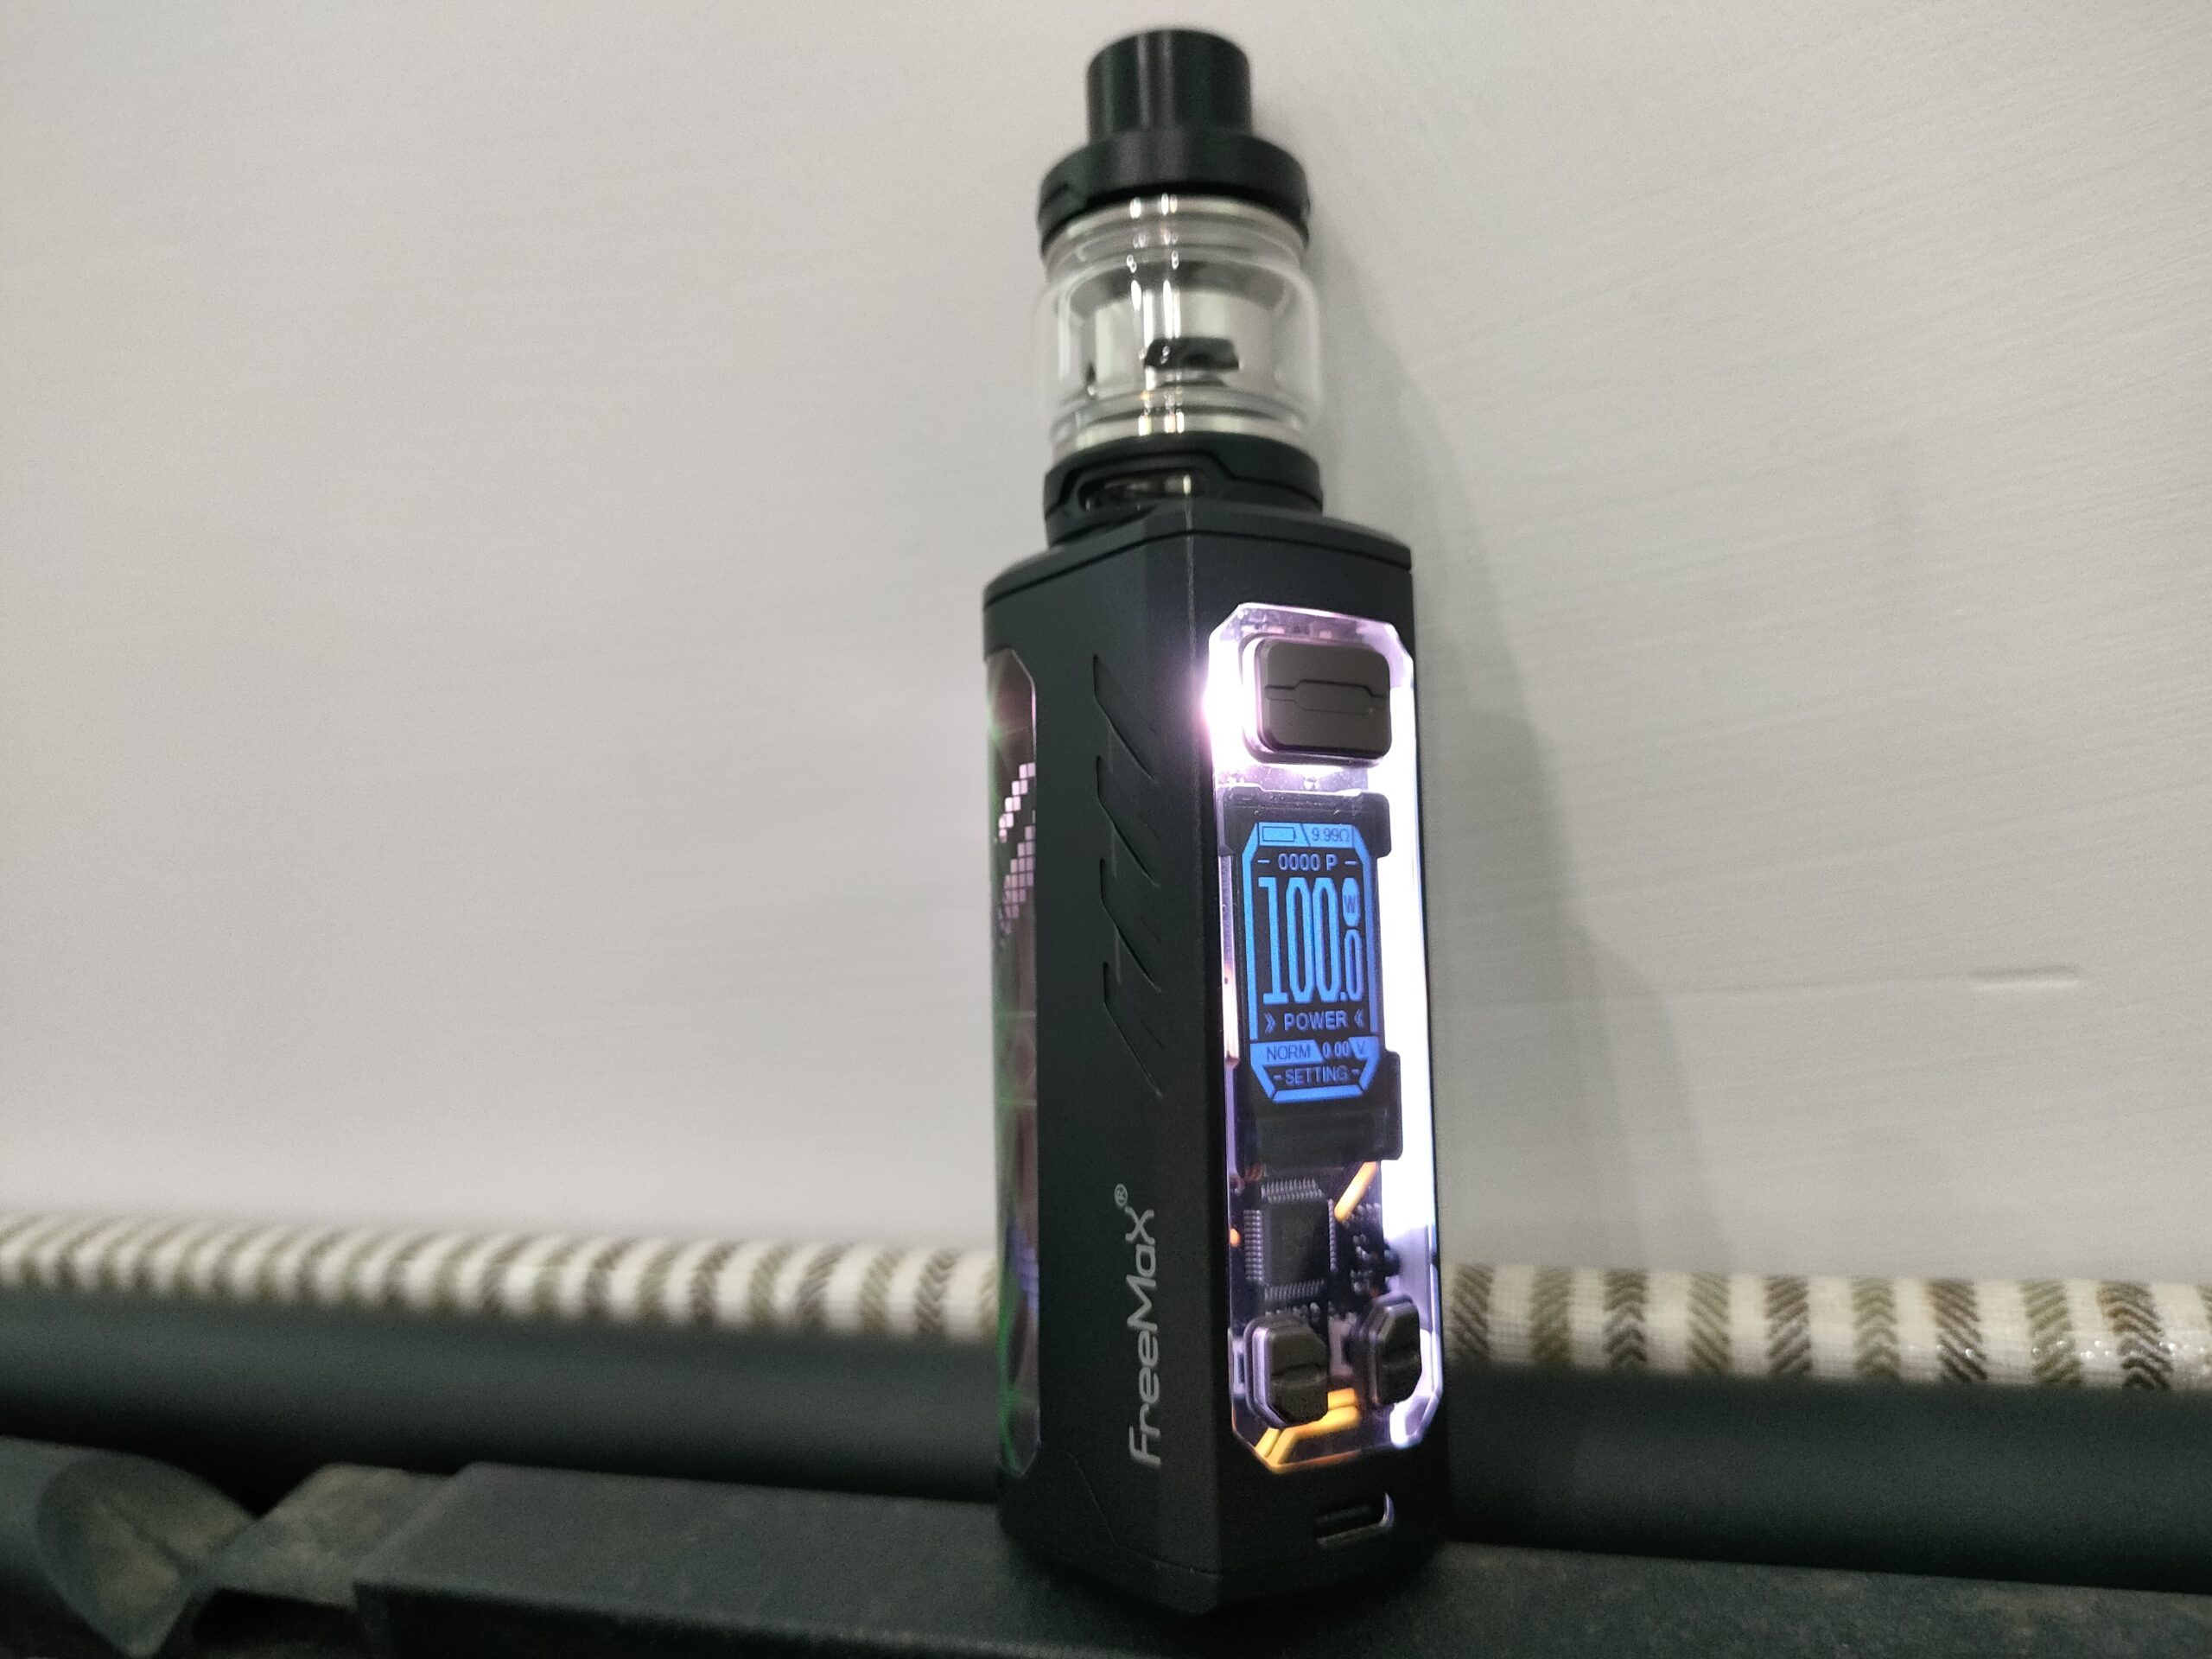
4. Select SAME coil or NEW coil, and press the fire button 3 times to choose output mode. then click *+/-” button to set wattage/temperature level according to the coil specification(#1W/t10″F/t5″C)
5. Adjust the airflow. then press and hold the fire button to start to vape.
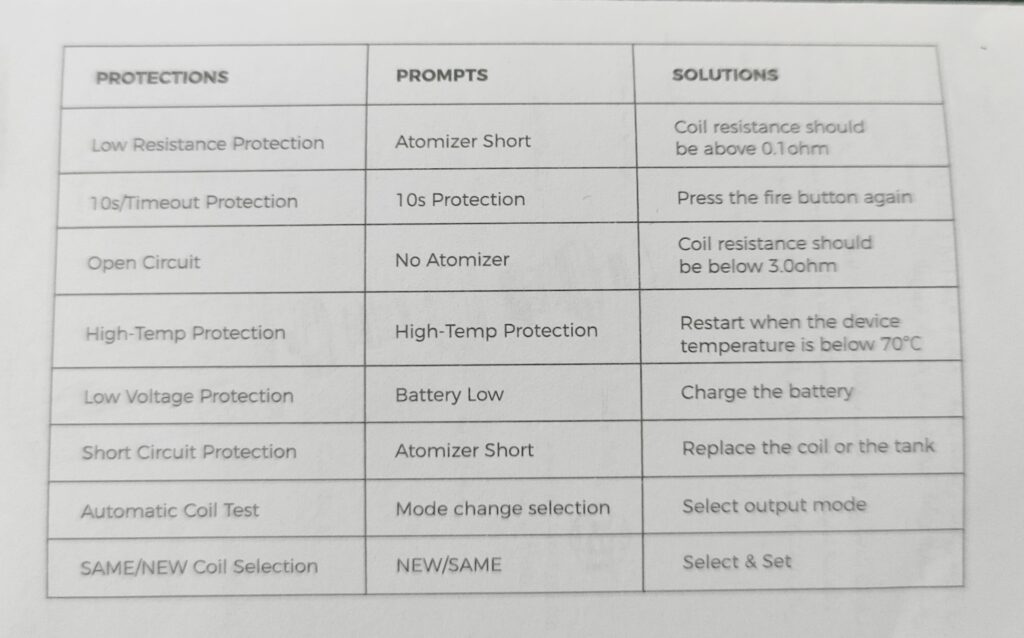
PROTECTION AND PROMPTS
Charging indicator
| Indicator light | Battery percentage |
| Green | 80%~100% |
| Yellow | 50%~80% |
| Red | 0%~50% |
Function Instructions
1. Key Lock/Unlock: Press and hold the”+” &”-” buttons 1s simultaneously;
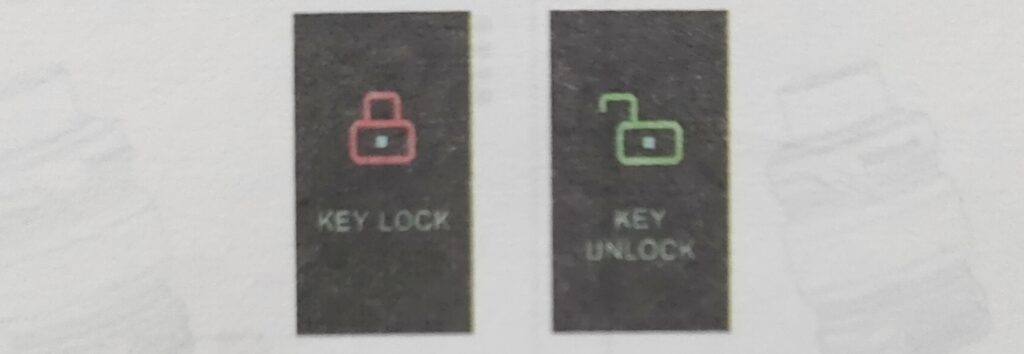
2. Device Lock: Slide down the side switch to lock the device while it is on. At this point, no matter which key is pressed, the “DEVICE LOCK” prompt will always appear on the screen.Slide the switch up to unlock and enter the main interface.

3. Output Mode Selection: Press fire button 3 times to enter the setting state and click fire button again to enter mode setting; press “+/-” button to choose Power (Normal, Sport, ECO)VPC/Bypass/TC (SS316, NI, TI)/TCR (TCR 1, TCR 2, TCR 3);

4. VPC Power Setting: Toggle to VPC on the mode state, press fire button to confirm and press “+/-” button to choose. Press and hold fire button 2s to exit. After setting, real-time curve output will be shown on the screen while vaping;
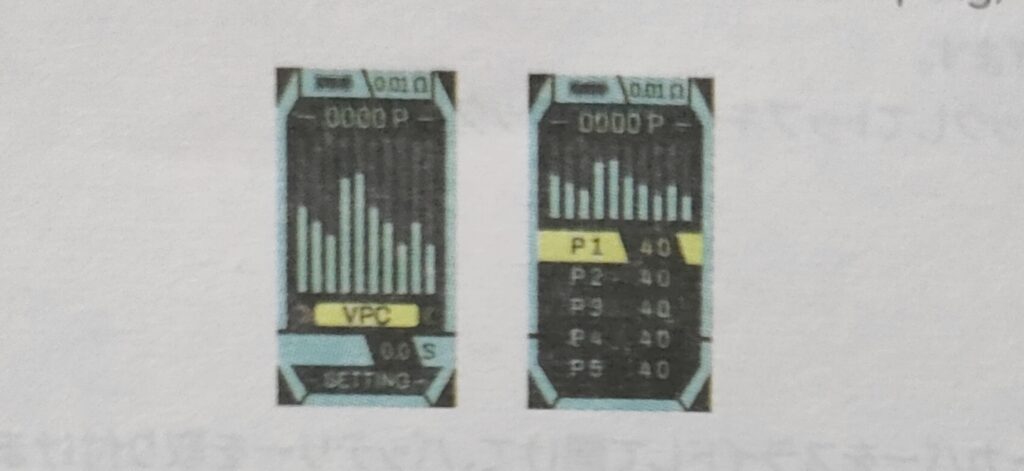
5. TCR Setting: Toggle to TRC on the mode state, press “+/-” button to choose TCR 1, TCR 2 or TCR 3. After confirming the sub-mode, move the cursor to the TCR value option and press fire button to enter the interface for adjustment;
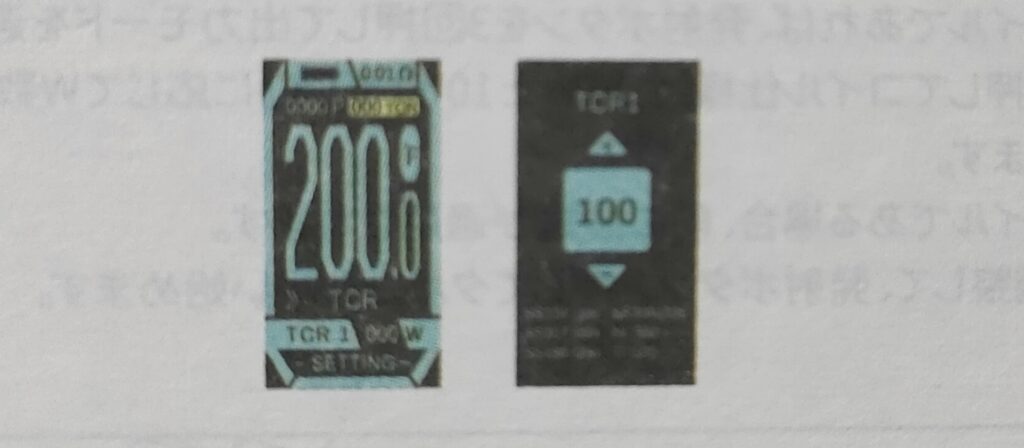
6. Firing Wattage Setting: In the TC mode move the cursor to the wattage option and press fire button to confirm selection then press”+”/”-“button to adjust:
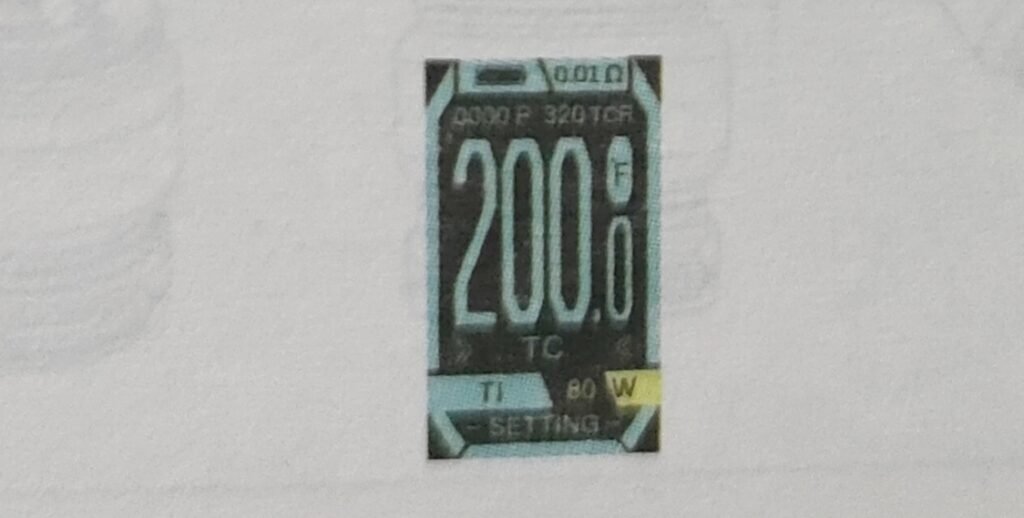
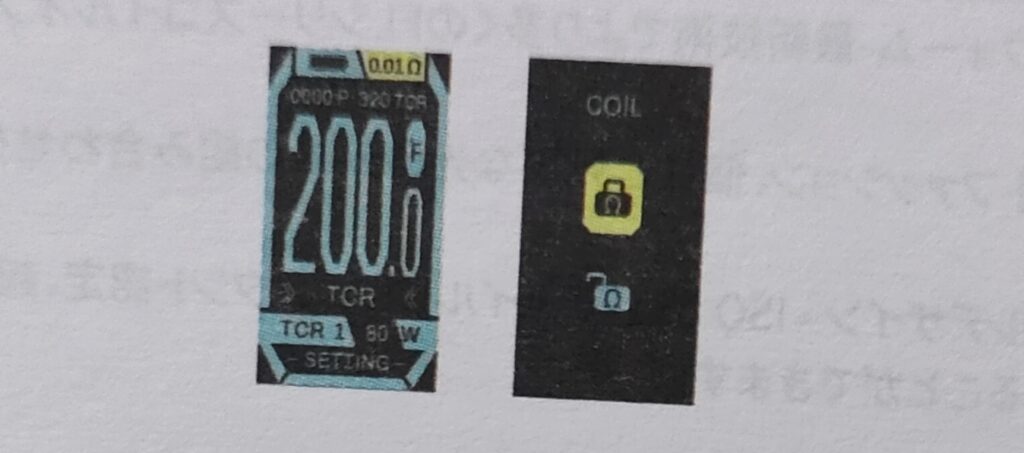
7. TC Mode Resistance Lock: In the TC/TCR mode, press “+/-“button to choose the resistance option in the upper right corner, then press fire button to enter and use”+”/”-“button to choose LOCK/UNLOCK;
8. Tum on/off Automatic Coil Test: Press and hold the fire button and – button for 1s simultaneously to enter the settings menu. or press fire button 3 times to enter the setting state and then select the SETTING option to enter; Select the COILTEST option in the SETTING menu, press “+”/”-” button to turn on/off;

9. Timeout Setting: Select the TIMEOUT option in the setting menu. Press “+”/”-“button to set the time limit from 5s to 15s (default timeout limit is 10s).
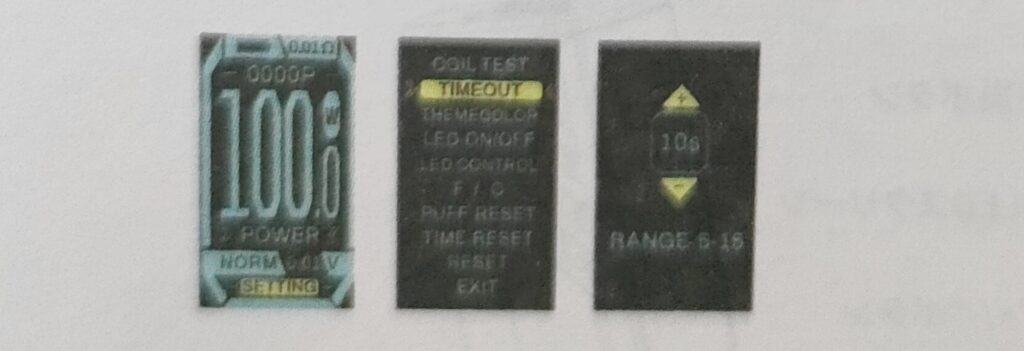
10. Switch Theme Color: Select the THEME COLOR option in the SETTING menu, press”+”/”-” button to switch the theme color.

11. Turn on/off LED Light: Select the LED ON/OFF option in the SETTING menu, press “+/-” button to turn on/off.
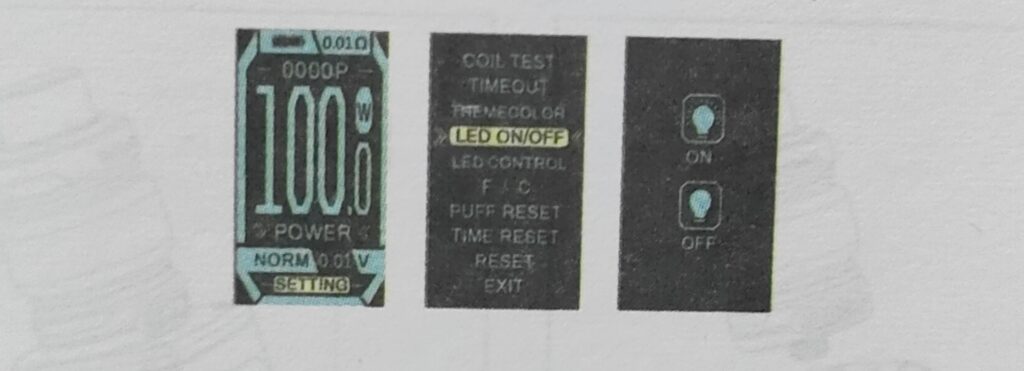
12. Switch LED Effect and Color: Select the LED CONTROLoption in the SETTING menu, press “+/-” button to choose how the LED lights up and what color it is.

13. Switch Temp Unit (°C/°F): Select the “C/”F option in the setting menu, use “+/-” button to choose;
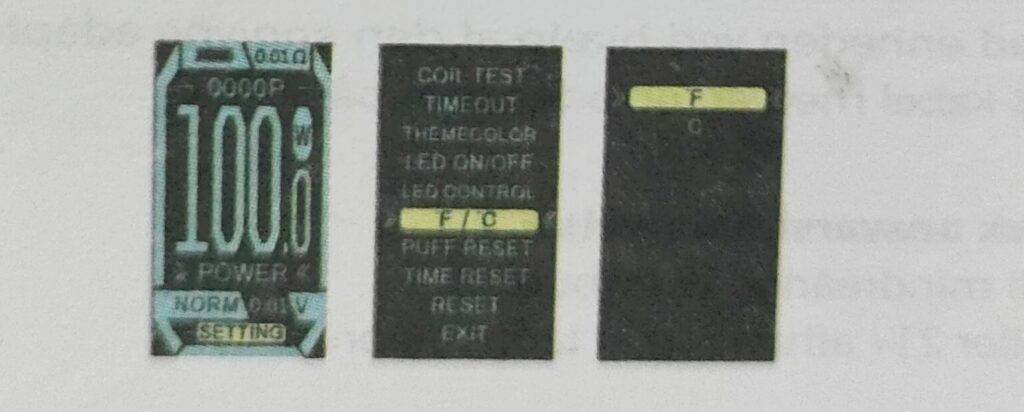
14. Puff Reset Time Reset: Select the PUFF RESET/IME RESEToption in the SETTING menu, press fire button to reset.

15. Factory Reset:
① Select the RESET option in the SETTING menu, press fire button to restore factory settings;
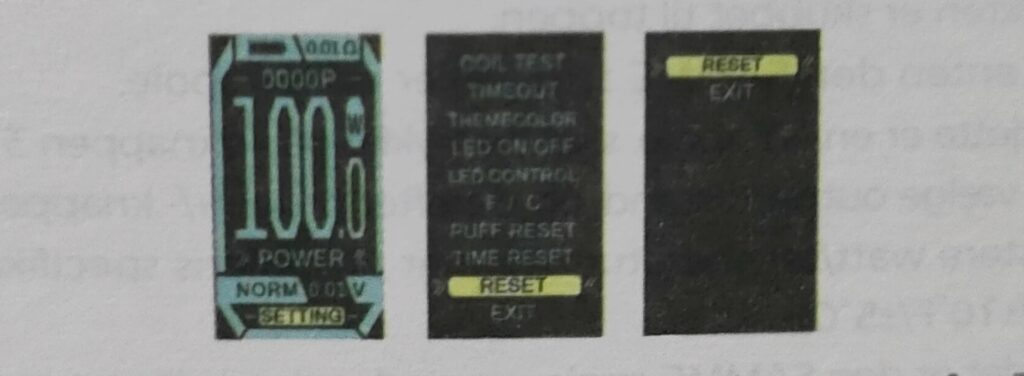
②Press and hold the fire button and “+/-” button for 3ssimultaneously to restore factory settings.
Attention:
1. Wait at least 5 mins after filling to make sure the coil is fully wicked for first-time use;
2. Adjust the mod from low wattage too high wattage;
3. Refill the tank when e-liquid is nearly used up to avoid dry-burning;
4. If kept unused for a long time, the tank and mod should be kept separately;
5. Please charge the device with recommended adaptor and USB cable with charging current of 5V/2A
Learn more:
Freemax Maxus Solo 100W Kit


