Thank you for choosing UOY! Please read this manual carefully to ensure
proper use. For additional information regarding this product or its use, please consult your local UOY retailer or visit our website www.ijoycig.com
Product Introduction:
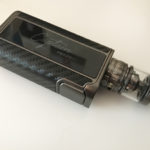
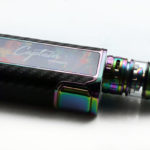
The Elite Mini Kit is the evolution of IJOY RDTA Box mini platform, being capable offering up to 60Wwith a built-in 2200mAh Li-Po battery while retaining the versatiIe foundationaI form factor. It is sleek and portabIe It is a new compact all-in-one kit that integrates three different vape styles into one chassis. Included with each kit is a IJOY RDTA Box mini mod, a IJOY Captain Elite SUBOHM&RTATankand a IJOY J& P Pod Adapter which extends ultimate flexibility in one device.
The Elite Mini Kit aims at providing ease of use, a rich flavor ecosystem and ultimate flexibility. It is a wonderful kit for entry level to enthusiast level vapers.
Parameter
1 * UOY BOX MINl(2200MAH) 1* USBCable
1 * Manual 1*WarrantyCard
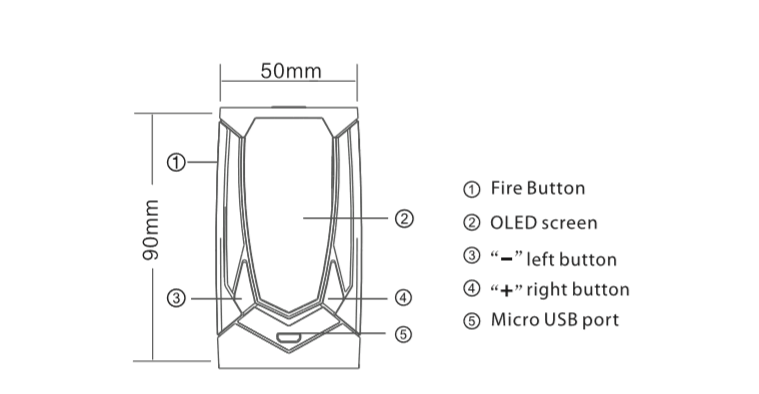
Specifications
• Screen size: 0.96″0LED.
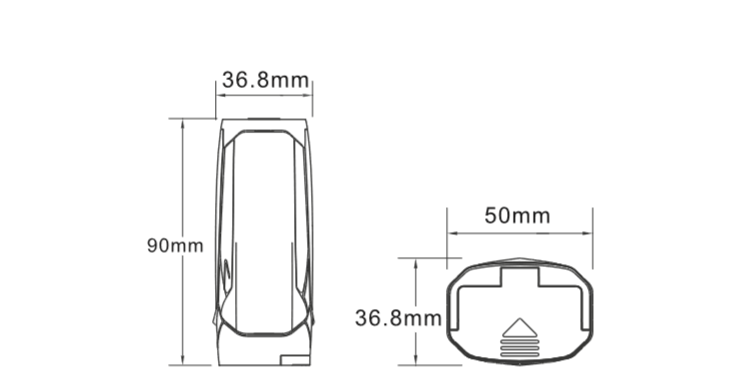
• Size: 45*25*74 7mm /1.77*0.98*2.94 inches.
• Output Wattage: 5watts-60watts.
• Output Voltage: lVolts-8.0Volts.
• Output Current: 1.0A-30A.
• Temperature Range: 300-600’F/ 150-31 S”C
• Wattage control mode wire Resistance Range: O.OSohm-3.0ohm
• Power efficiency: 95%.
• Fire method: Stainless steel metal stretch button.
• Adjust power method: up and down button.
• Upgradable firmware: YES.
• Output mode·VW/TI/Nl/55 and special USER Mode
• Built-in Li-Po 2200 mAh battery
• Tank removable
• Big size filling hole
IJOY AVENGER KIT Operation Instruction:
1. Power On/off

Press the fire button 5 times m quick succession to turn the device on and off. After switch on, OLED display BOX mini logo and software version number at stand by mode.
(Note:
Please adjust the wattage to a proper range to match the atomizer you used before using.
2.Vaping
While the device is power on, just keep pressing the fire button to vape
(Firing timeout: 10 Seconds)
While the device is power on, the OLED screen default display VW Mode.
3. General Functions

Enter Into The Main Menu
Press the fire button 3 times to enter into the buttons to switch among different functions. Press the fire button to confirm.
Press the firebutton 3 times within 2 seconds to enter the main menu.Press right and left toswitch to” ![]() “setting, press fire button to confirm and enter Norm mode. Press right and left buttons to adjust the wattage.
“setting, press fire button to confirm and enter Norm mode. Press right and left buttons to adjust the wattage.
4. Power Mode

In the main menu, switch to”P” setting, press fire button to confirm. Press right and left buttons to ad丿ust the wattage.
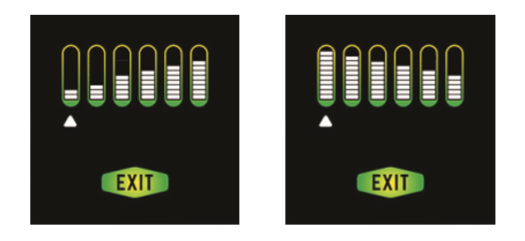
Intensity Setting In Power Mode
In the main menu, switch to intensity setting, press fire button to confirm Press right and left buttons to switch among below4 modes. In user mode, press fire button to switch among each setting columns. Press right and left buttons to adjust the wattage After setup is completed, press fire button to switch to”EXIT”. Press right or left button to confirm.
Norm Mode: Maintains the currently set power.
Hard Mode: 30% higher than the currently set power.
Soft Mode: 20% lower than the currently set power.
User Mode. Customize the power output for the first three seconds of each puff, with each setting column representing half a second.
5. Intensity Setting In Power Mode
In the main menu, switch to intensity setting, press fire button to confirm. Press right and left buttons to switch among below4 modes. In user mode, press fire button to switch among each setting columns. Press right and left buttons to adjust the wattage. After setup is completed, press fire button to switch to’EXIT”. Press right or left button to confirm.
The temperature unit will cycle between ° F and °C when the minimum or maximum temperature is reached.
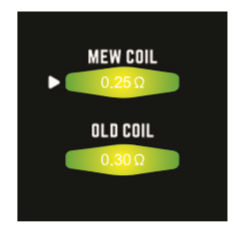
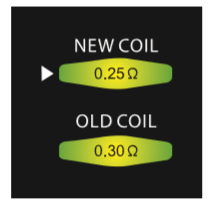
In the temperature control mode to replace the heating wire, when the new heating wire resistance and the previous heating wire resistance difference greater than or equal to 0.2ohm, the screen appears the following tips. Press+ to choose and confirm new coil. Press -to choose and confirm same coil.
6. Temp Mode
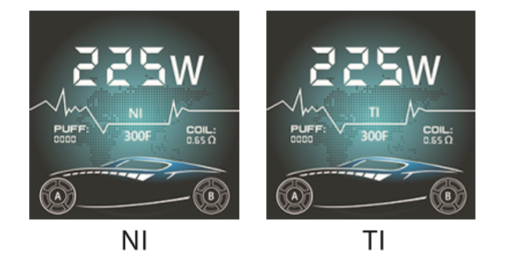
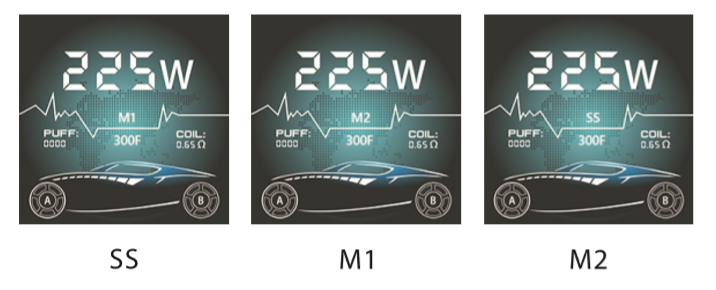
Ni/Ti /SS/TCR M1/TCR M2
In the main menu, switch to”T” setting, press fire button to confirm. Press 叩ht and left buttons to switch among Ni/Ti/SS/M1/M2 modes. Press fire button to confirm. Press right button, when “W” flashing, press right and left buttons to ad丿ust wattage. Press left button, when”° F”or”°C” flashing, press right and left buttons to adjust temperature value. The temperatu『e unit will cycle between ° F and °C when the minimum or maximum temperature is reached.
In the temperature control mode to replace the heating wire, the first let Heating wire in the indoor temperature, after installed the heating wire,The screen will appear the heating wire resistance, Figure 1 is the heating wire Of the initial value, if the “resistance” is very accurate directly Use, if not very accurate then need to correct the heating wire Of the『esistance.
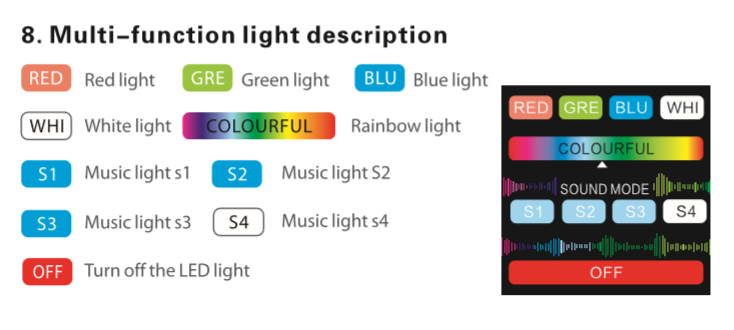
7. LED Multi-funcion Light
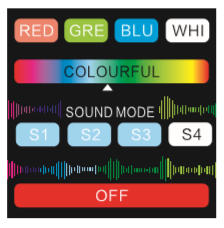
Switch ![]() to in the main menu, pres s fire button to enter the LED Multi-function Light Setti ng s. Press”+””-” button to enter the corresponding mode.
to in the main menu, pres s fire button to enter the LED Multi-function Light Setti ng s. Press”+””-” button to enter the corresponding mode.
9.TCR Mode(M1,M2)
With theTCR (Temperature Coefficient of Resistance) function available now, you can customize your temperature control coils(Ni, Ti, 55) on your own. In the main menu, switch to ![]() setting, press fire button to confirm. 5witch to M1/M2 modes. Press fire button to confirm.
setting, press fire button to confirm. 5witch to M1/M2 modes. Press fire button to confirm.
10. How to set the TCR7
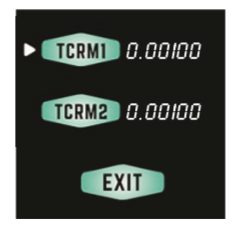
In the main menu, switch to·rcR·mode indication, press fire button to confirm. Press fire button to choose betweenTCR Ml, TCR M2. Press right/left buttons to select certain parameter. After setup is completed, press fire button to switch to·EXIY. Press right or left button to confirm.
11. Puff counter
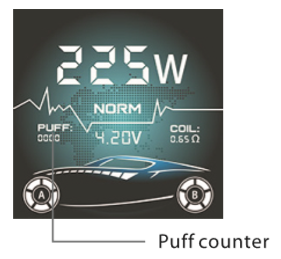
In any mode, the screen shows the number of puffs. If a puff more than O.Bs, it will be recorded as one puff. The device can remember the value even if you remove the battery. the default number is “0000When the number reaches”9999”, it will be cleared automatically.
12. How to clear the puff value manually?
Press the fire button 3 times in 2s to enter the menu, choose icon to
enter the”PUFF rest” setting, press fire button
to confirm your choice
13. Voice Ai Setting
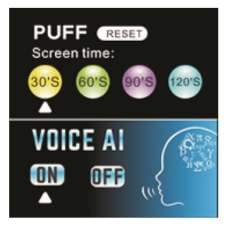
Press the firebutton 3 times within 2 seconds to enter the main menu, then choose the ![]() icon to enter into the submenu. Press the”+” and” -“button to switch ON/OFF of”VOICE Al”. Select”ON” to turn on the VOICE Al, “OFF” to turn off it.
icon to enter into the submenu. Press the”+” and” -“button to switch ON/OFF of”VOICE Al”. Select”ON” to turn on the VOICE Al, “OFF” to turn off it.
In the voice control mode, please avoid using in a noisy environment.
14. Voice Instruction
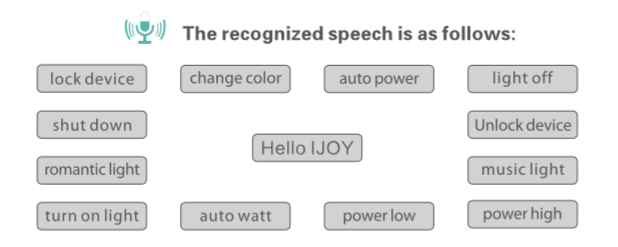
Need to say”Hello IJOY”before using the voice control function. The function will stop automatically after 6 seconds.
15. Auto Watt &Auto Power Voice Setting
When Voice control is on, if Auto Watt or Auto Power commands are spoken, the output power will be adjusted automatically to the optimum value according to the atomizer 『esistance to optimize the taste.
(If there is no atomizer, the screen will show: NO ATOMIZER)
16. Set the standby mode
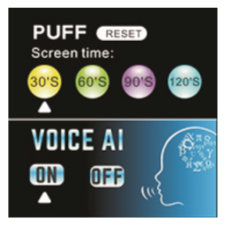
Press the fire button 3 times in 2s to enter the menu, choose”![]() ‘icon, use+ andbutton to choose’Screen Time”area, there are 4 preset choices, press fire button to confirm your choice, the screen will enter standby mode at the selected time
‘icon, use+ andbutton to choose’Screen Time”area, there are 4 preset choices, press fire button to confirm your choice, the screen will enter standby mode at the selected time
17. How to calibrate the resistance?
When the device connected with a new atomizer, press+ and – button at the same time to calibrate the initial resistance of the new atomizer.
We recommend to calibrate resistance in temperature control mode , you can make the temperature control more accurate, please note that this operation requires heating wire cooling to room temperature.
18. Lock Screen
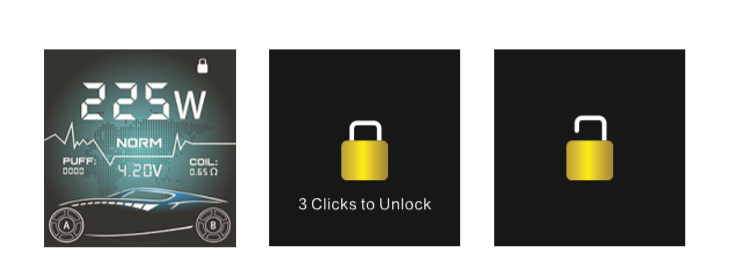
With Voice Al activated, when”Lock Device”voice command is issued, the main menu will appear SMALL LOCK PICTURE (As shown in picture 15.1). Va ping cannot be done at this moment.And the BIG LOCK PICTURE will show after pressing the fire button(As shown in picture 15.2). Unlock the Device by quick pressing fire button 3 times or by saying”Unlock the device”when Voice Al is activated.
19. Firmware Upgrade
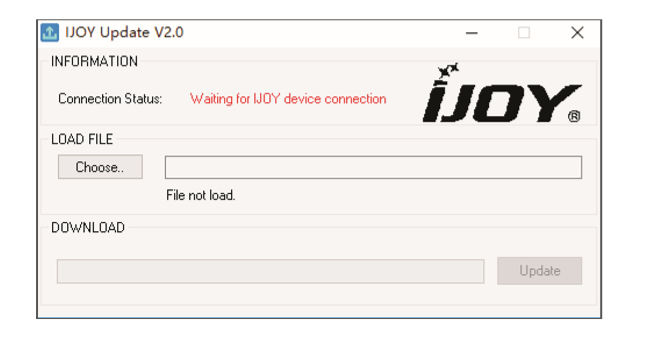
Connect to the computer USB and open the upgrade software(as shown in picture 16.1). Wait for the upgrade software displays successfully connected Click”Choose”on the PC and open the program to be updated. Click Update to start upgrade. After completing upgrade, it can be used normally.
20. How to charge by USB?
When the voltage is lower than 3.3V, the display will show”Low Battery”, then you need to charge the device, please connect the device through the USB cable to the computer or power adapter.
1, in the charging process, The battery energy column indicator will scrolling,
when fully charged , it will stop scrolling.
2, in the charging process, the battery voltage is lower than 3.2V, the device
is turned off.
3, can not vape during charging
(If the device not be used for a long time, please charge every 30
to 60 days to make sure battery life.)
21.Malfunction

Indication and Protection
PCB temperature overheat protection When the temperature of device is too high, the output will shut off automatically and the screen will display”PCB HOT”
Low power alert:
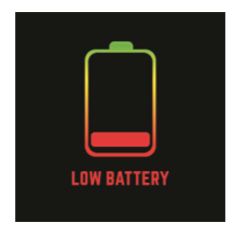
When battery voltage is below 3.2V, the device shows” LOW BATTERY”
PCB Atomizer short
circuit protection:

When atomize『short-circuit occurs, the OLEO screen will display”SHORTED”
No Atomizer
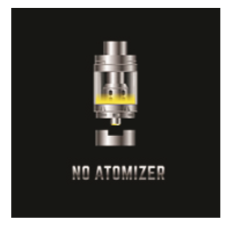
when no atomizer connect,the device will display”No atomizer”
Warnings
1. Please read the manual carefully before use
2. Please do not keep the ejuice inside the atomizer if the device is not going to be used for a long period
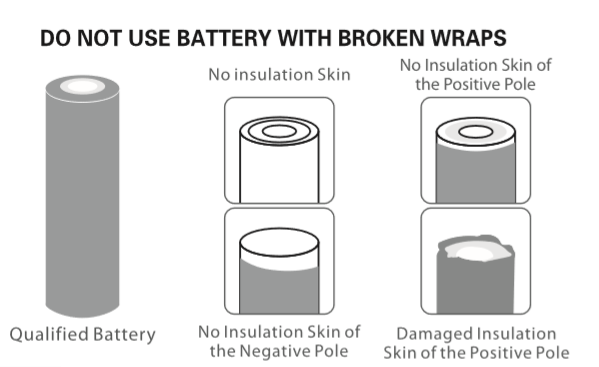
3. Please take out of the battery from device when it’s not used for a long time
4. Please keep the device away from children,pregnant women,and minors
(under 18 years of age)