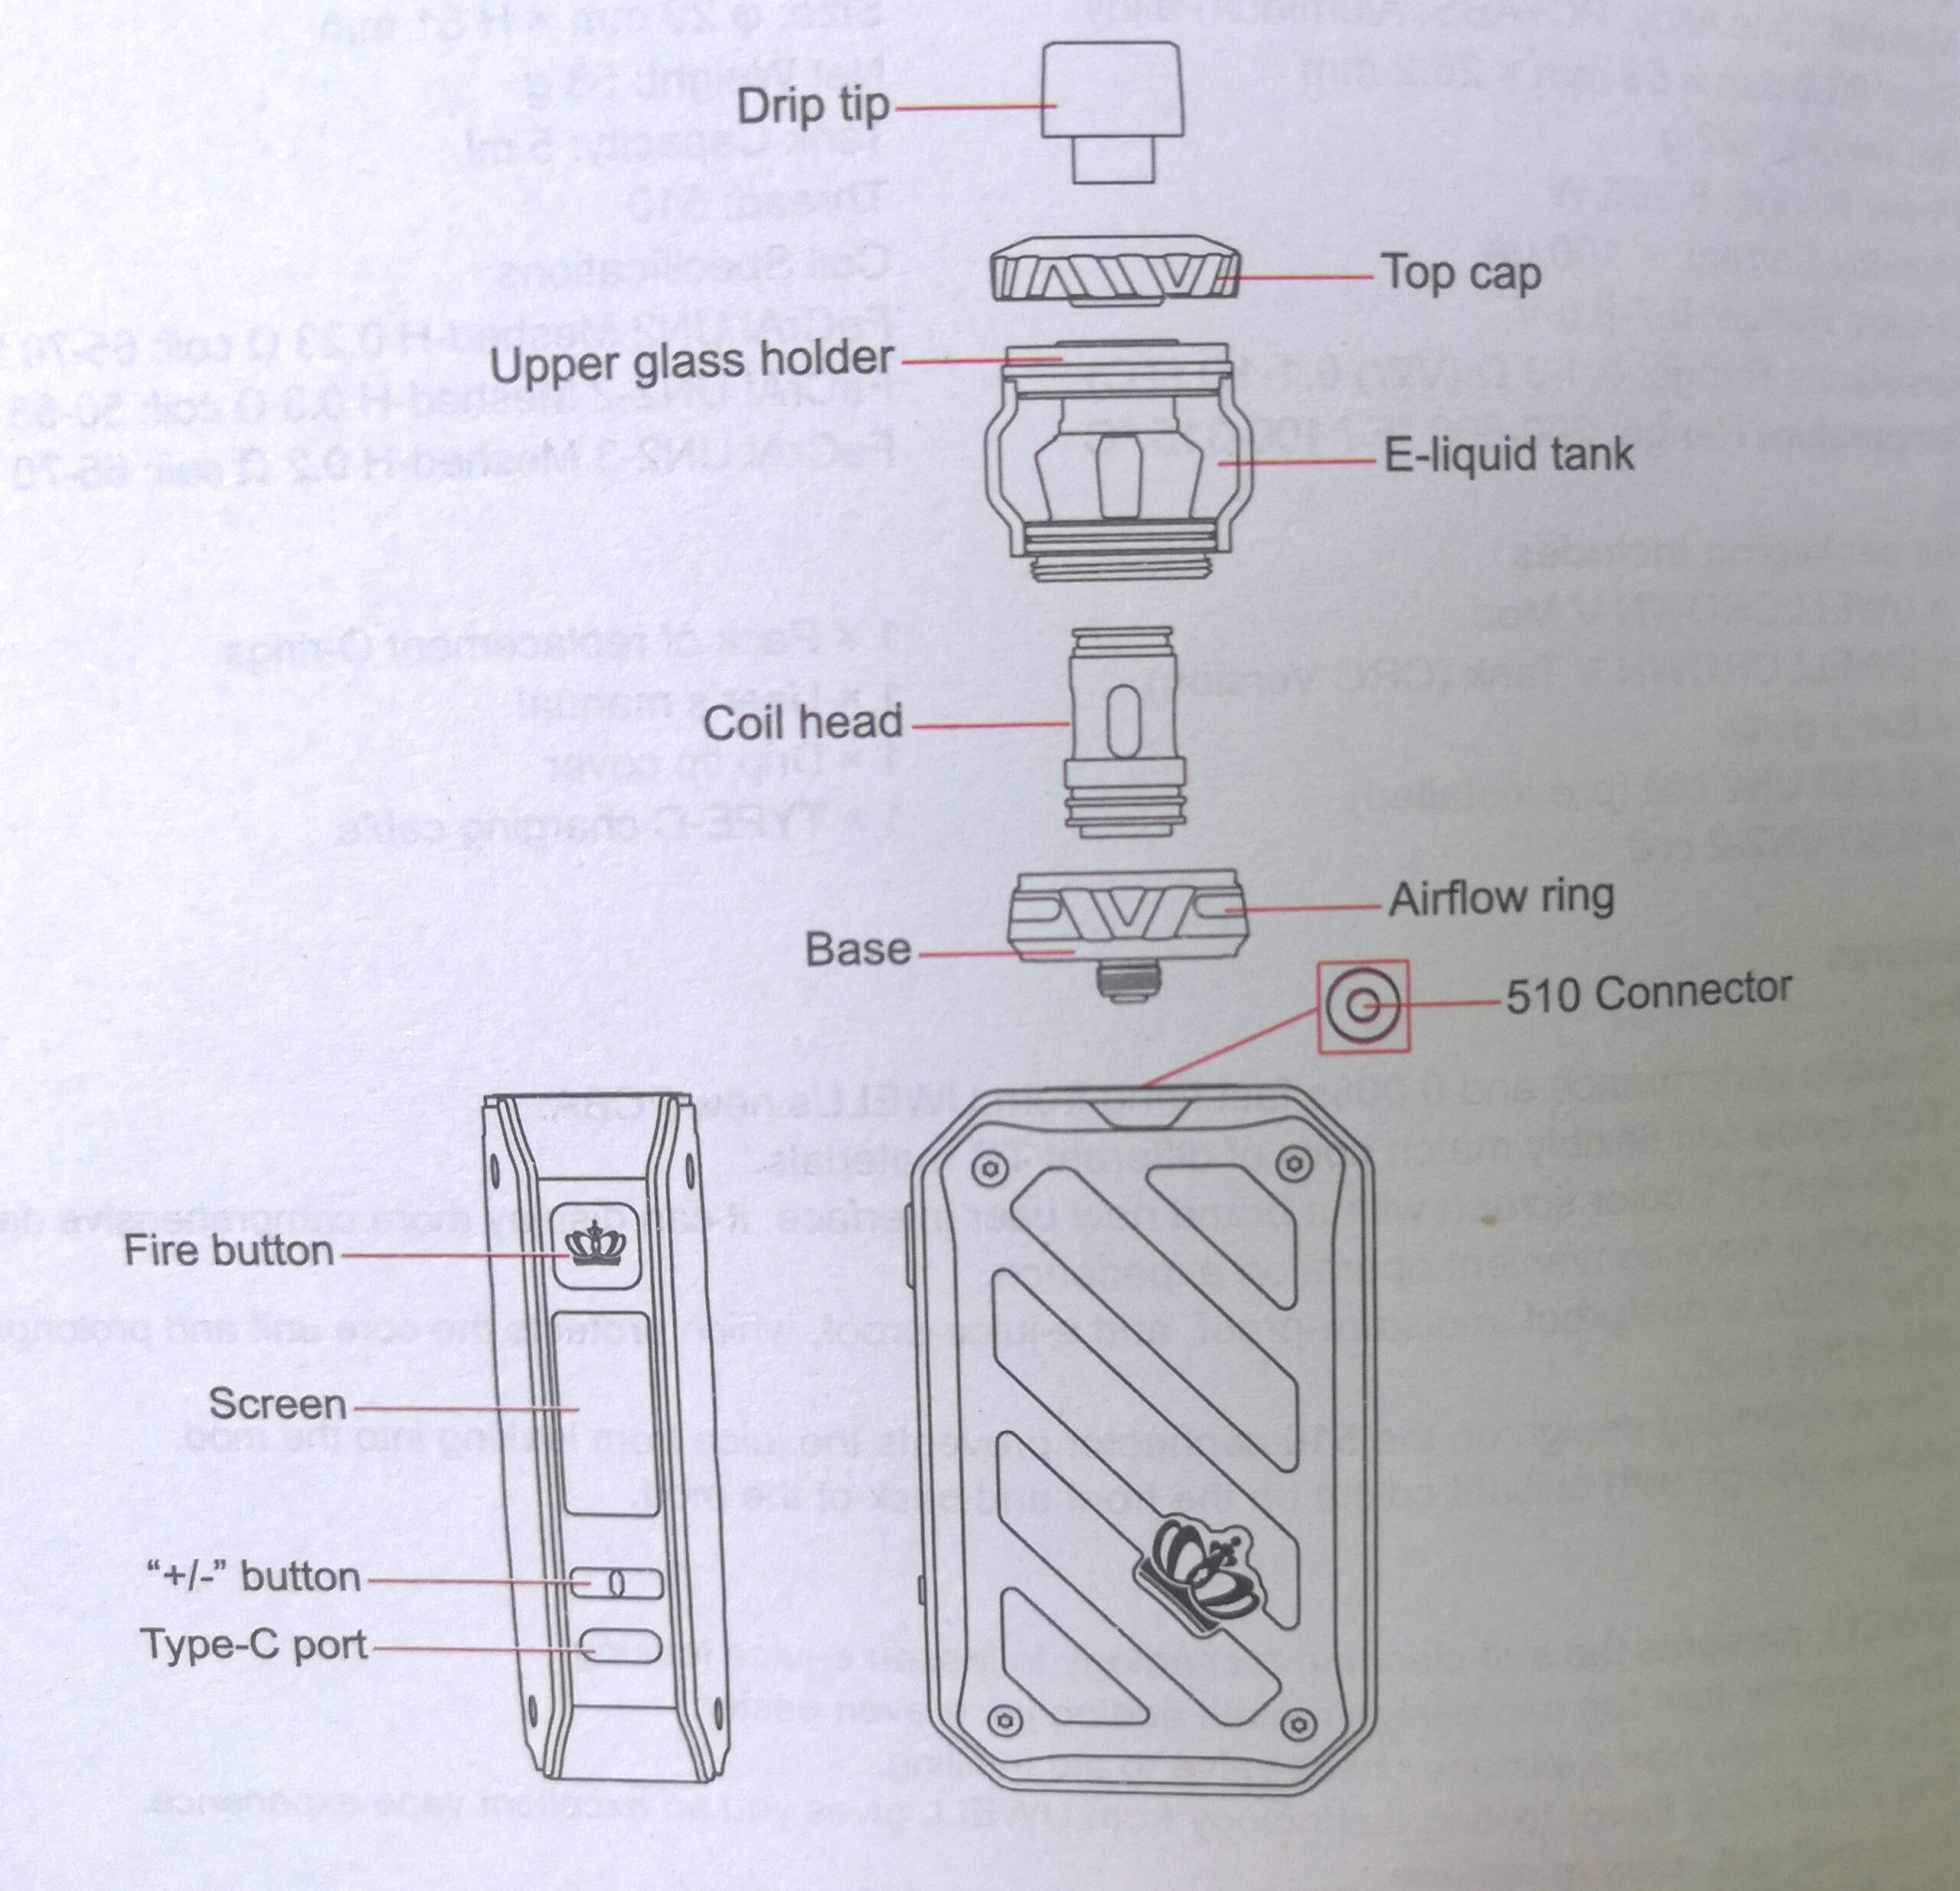
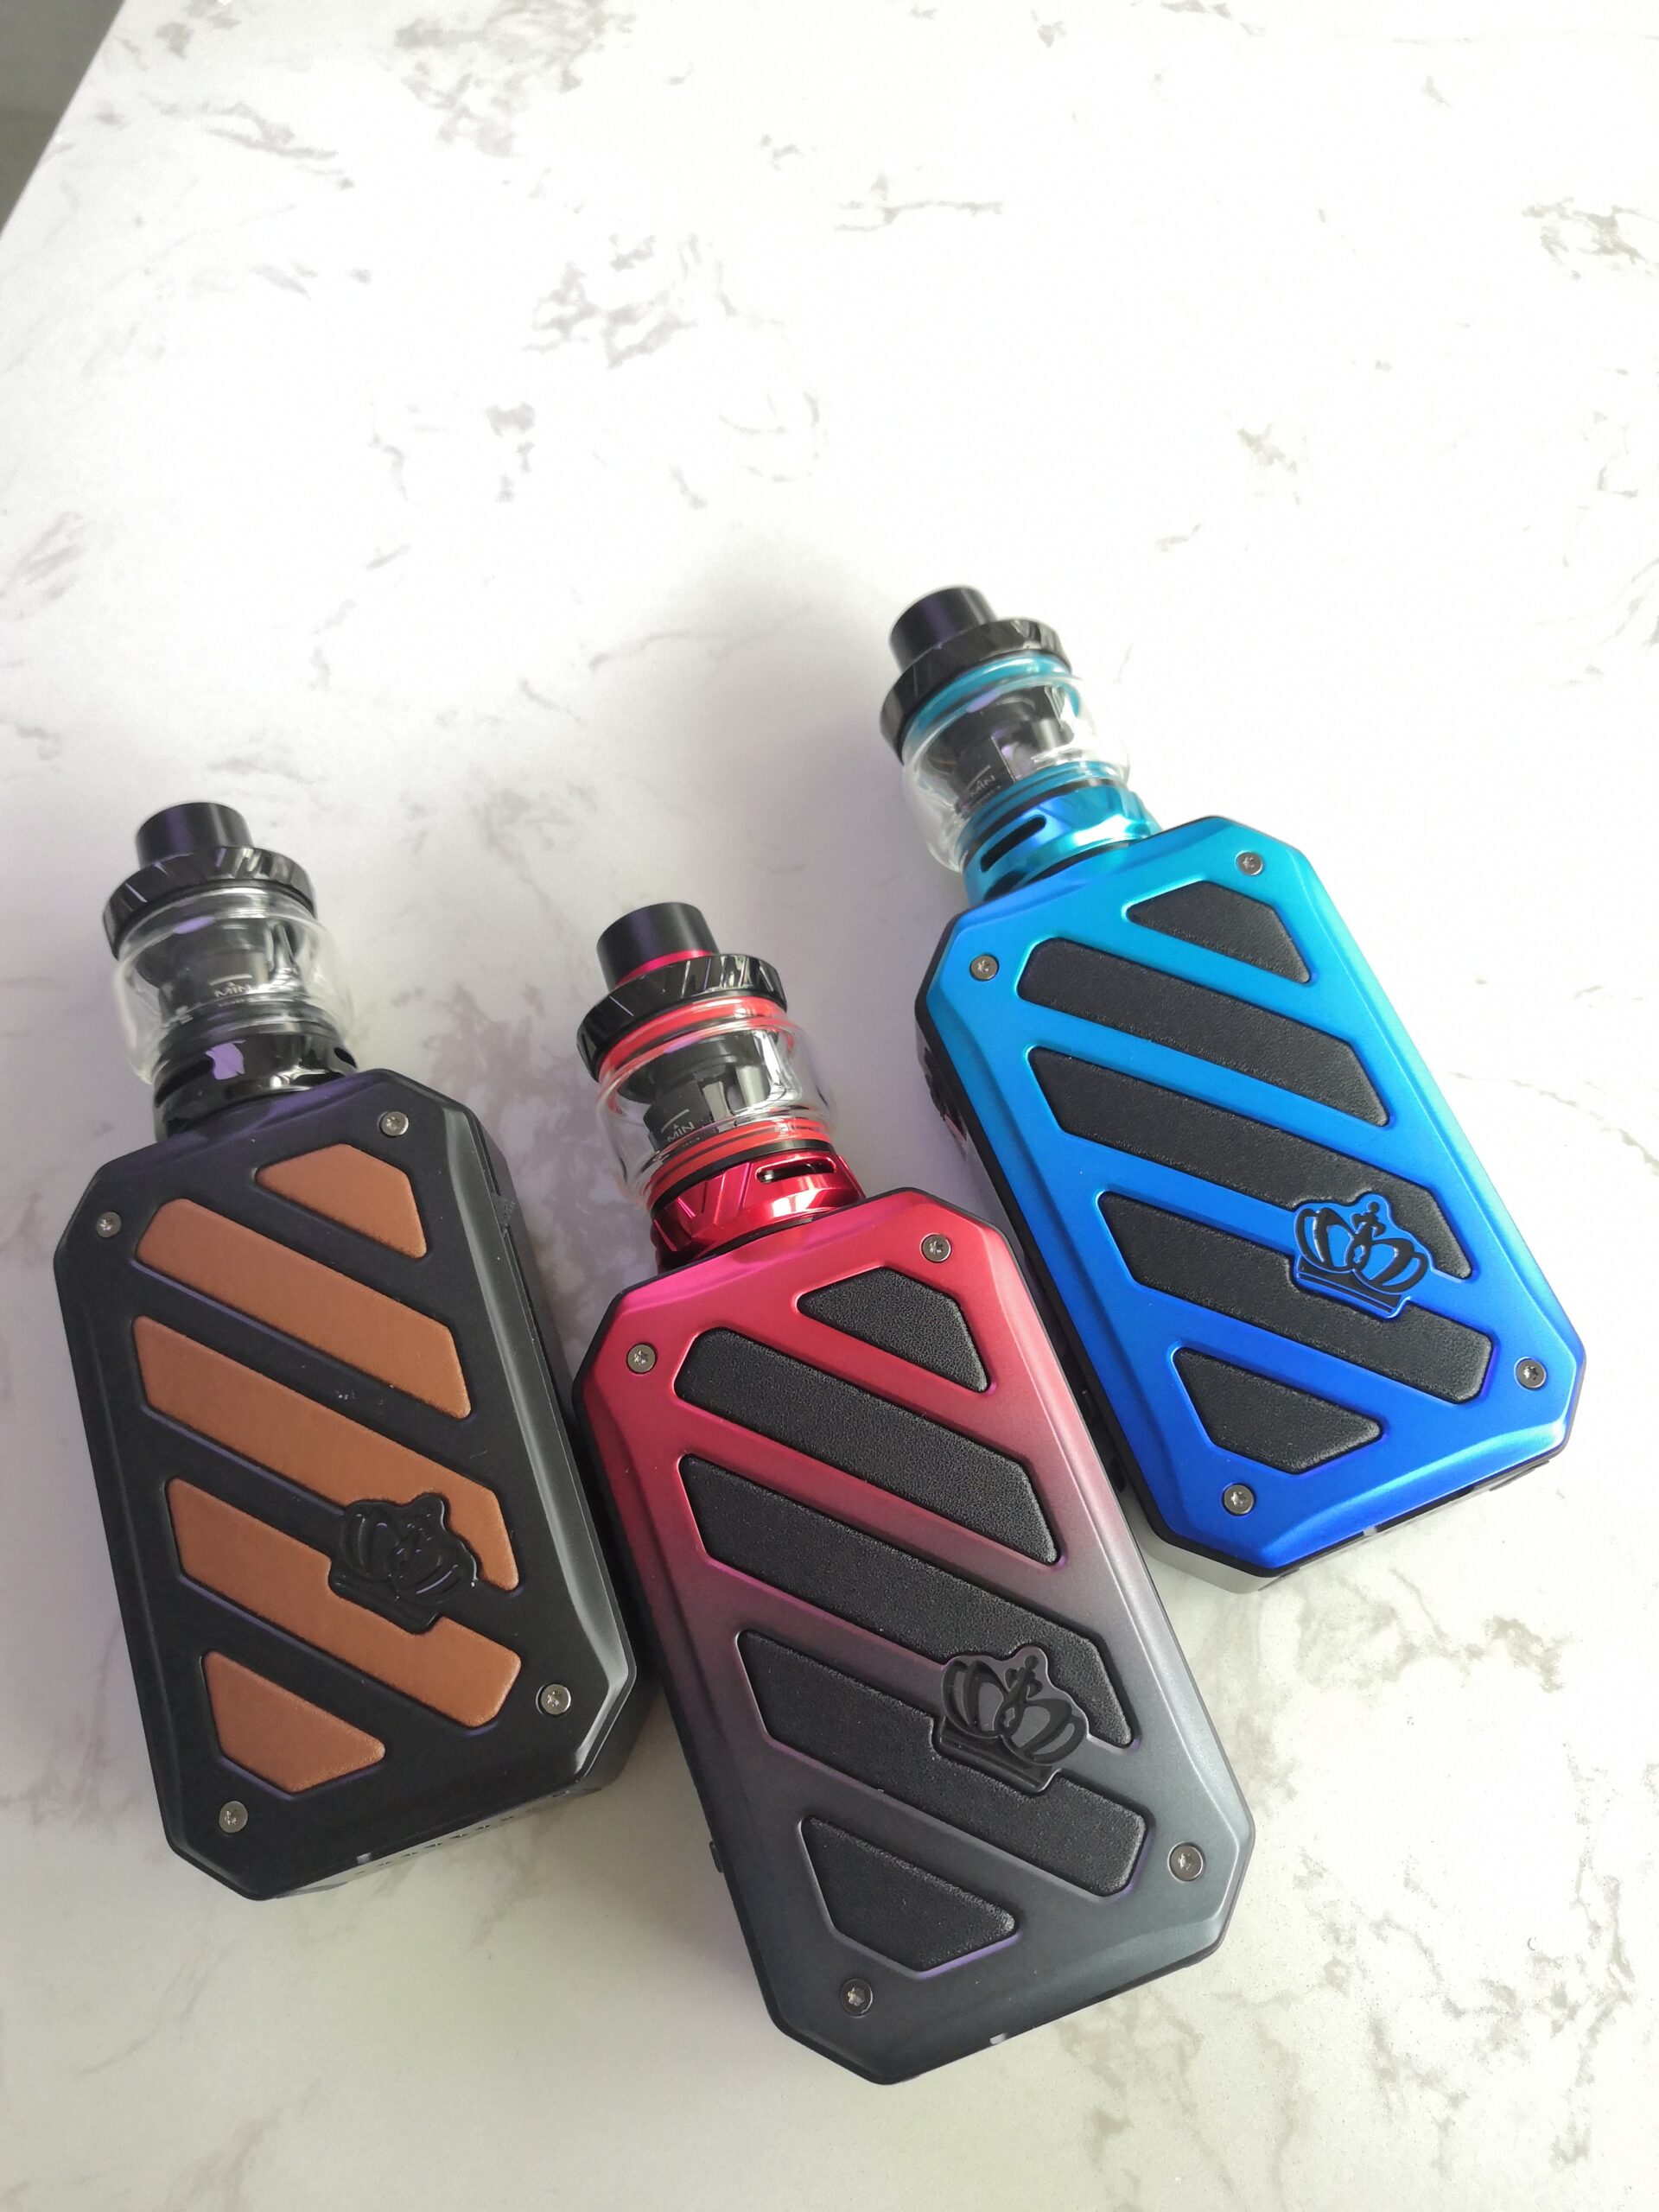
Product Illstration
Battery installation
Disassemble the battery cover, place batteries into the device according to the +/- signs,and then assemble the battery cover on the mod.
(Attention: 1. Do not reverse the battery, batteries shall be purchased separately)
Charging
Type-C Charging: Plug the Type-C cable connected to the 5V adapter into the Type-C port to charge.
(The screen will display a dynamic charging or fully charged icon during charging, and the screen will be off if the battery is not installed or reversed.)
Mod instructions\
1. Power on/off
Click the fire button 5 times within 2 seconds to turn on/off the mod.
2. Select the mode
When the device is on, press the fire button 3 times within 2 seconds to enter the mode options. Press the “+” button or “-” button to select work mode from “POW and “TCR”, then press the fire button to confirm. The device exits the setting when no operation in8 seconds.
3. “POW” mode – Power mode
After entering the power mode, press the “+/-” to adjust the wattage or hold the button to scroll through them faster. The wattage range is 5 – 200W. Attention: The output voltage will decrease gradually during vaping. When the output wattage can not reach the set wattage, the device will lower the wattage automatically, and then the screen will display the output voltage after automatically adjusting the wattage.
4. TCR
a. After entering the TCR mode, the wattage will flash. The power adjustment range is from 10 to 120W. Press the “+/-” to adjust the wattage, then press the fire button from 10to 120W. Press the “+-” to adjust the wattage. then press the fire button to confirm and enter TCR adjustment Press the *+(-” to adjust the TCR then press there button to confirm.
b. TCR range: 0.00010~0.01000. Recommended TCR of common heating wire materials SS3160: 00088 ± 0.00020; N200: 0.00690 ± 0.00020.
c. Wattage adjustment
In the TCR mode, press the “+ or “-” button to adjust the output temperature. When the temperature has reached the end of Fahrenheit, it will automatically switch to the celsius temperature; when the temperature has reached the end of Celsius, it will automatically switch to Fahrenheit temperature.
5. Resistance detection
Resistance detection shall be done automatically. The operation mode would be saved as the previous setting.
a. If there is no atomizer or the resistance of the coil is too high, press the fire button the screen will indicate an open circuit.
b. If the resistance of the coil is too low, press the fire button the screen will indicate a short círcuit.
6. Vaping
While the device is on, hold the fire button to vape; it will automatically stop firing when the button is held for longer than 10s.
7. How to lock your device
a. When the device is on, hold the fire button and the”·” button for 1 second to lock/unlock the device.
b. When the device is on, hold the fire button and + button for 1 second to lock/unlock Lothe “+/-” buttons.
8. Low power indication
When the voltage of either battery is lowerthan3.2v. Press the fire button the screen will indicate a low battery. Reverse battery protection
The device is equipped with reversed battery protection. If the batteries are reversed, the device can not tum on.
9. Temperature protection
The output will be cut off if the PCBA temperature increase to 80″C during vaping, the screen will display Too Hot! Please Wait; When the temperature decreases to 65″C, you are free to vape again.
10. Reverse battery protection
The device is equipped with reversed battery protection. If the batteries are reversed,the device can not tum on.
11. Factory reset
Hold the fire button, *+ and– button for 1 second the screen will display “Factory Reser.
12. Clear puff counter
Hold the “+” and “-.” button for 1 second to clear the puff counter.
Tank Instruction
- How to Top Fill
a. Turn the airflow ring to the closed position.
b. Press and twist the top cap 90 anticlockwise to unscrew the top cap.
c. Add e-liquid.
d. Press and twist the top cap back on with a clockwise turn.
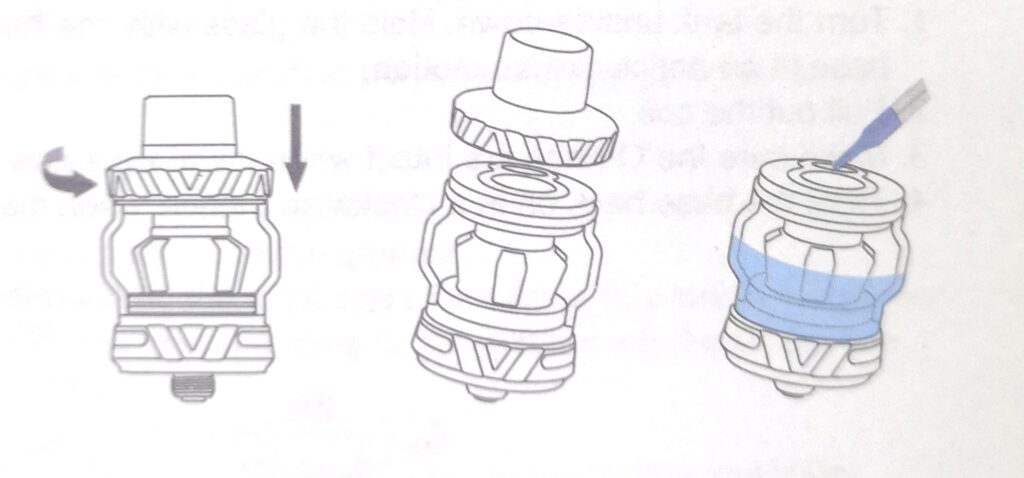
Caution:
a. Don’t put juice in the center hole.
b. Do not leave the top cap off for a long time to avoid leaking.
c. Instal top cap back and tighten it after refiling to prevent leaking.
d. When filing, only use a bottle that has a nozzle that can fit inside the opening of the tank, which is 3.5millimeters wide.
e. When using a new coil, please let it sit for 10 minutes after filing to avoid coil bumping.
- Glass Changing & Tank Cleaning
1. Twist the base anticlockwise to unscrew the base.
2. Hold the top cap with one hand, hold the glass with the other hand and twist off the glass with a clockwise tum.
3. Re-install the glass and base after cleaning or changing.
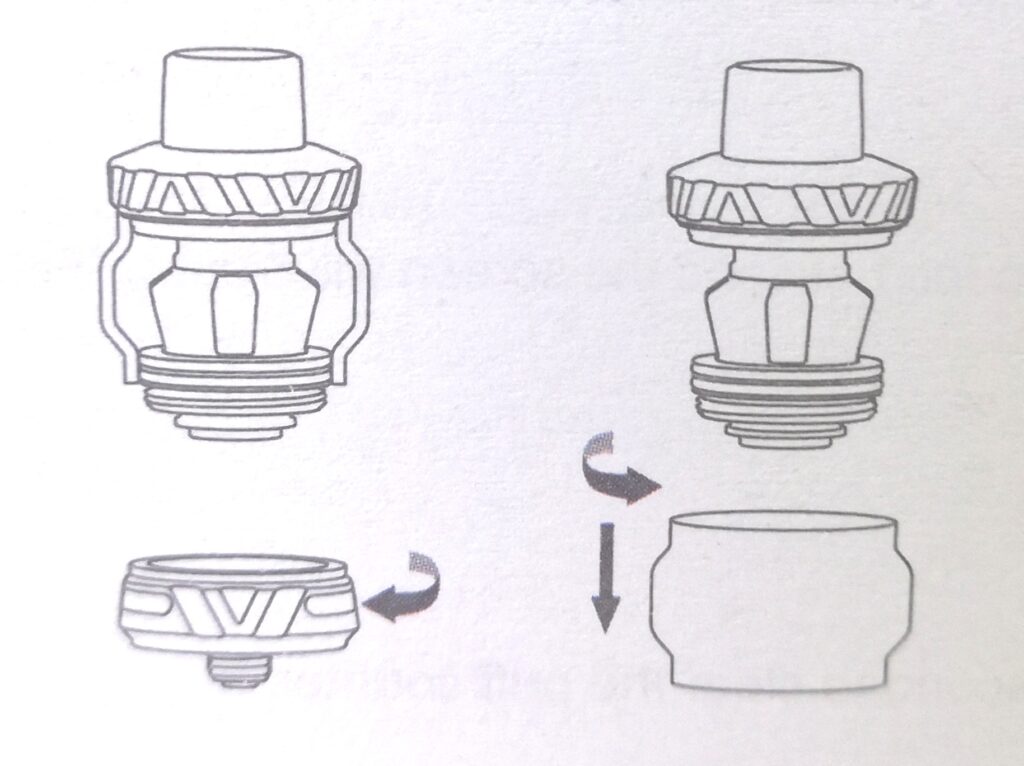
(Caution: Make sure that the glass is flush with the mounting surface of the upper glass holder. The O-rings on the side is not protruding out of the metal groove to avoid leakage.)
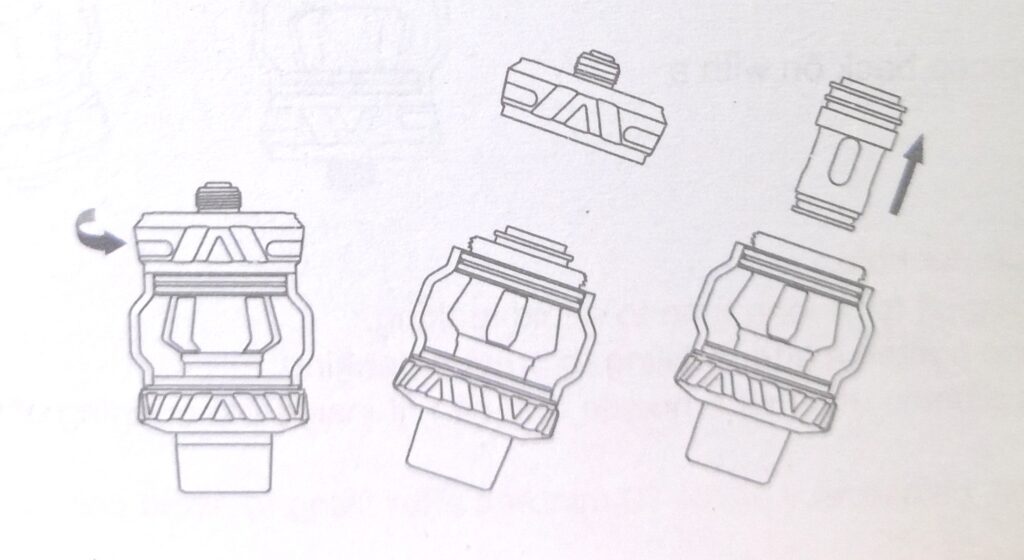
- How to change the coil
1. Tum the tank upside -down. Hold the glass with one hand, hold the base with another hand, twist off thebase in an anticlockwise motion.
2. Pull out the coil.
3. Make sure the O-rings are intac when installig a new coil head, and then plug in the new coil.
4. Twist the base back on in a clockwise motion, open the airflow.
Uwell Crown 5 V Kit VIDEO
Grab 40%OFF Crown 5 kit after applying the code “CR5K” by click the following button☟
Related posts