User Instruction
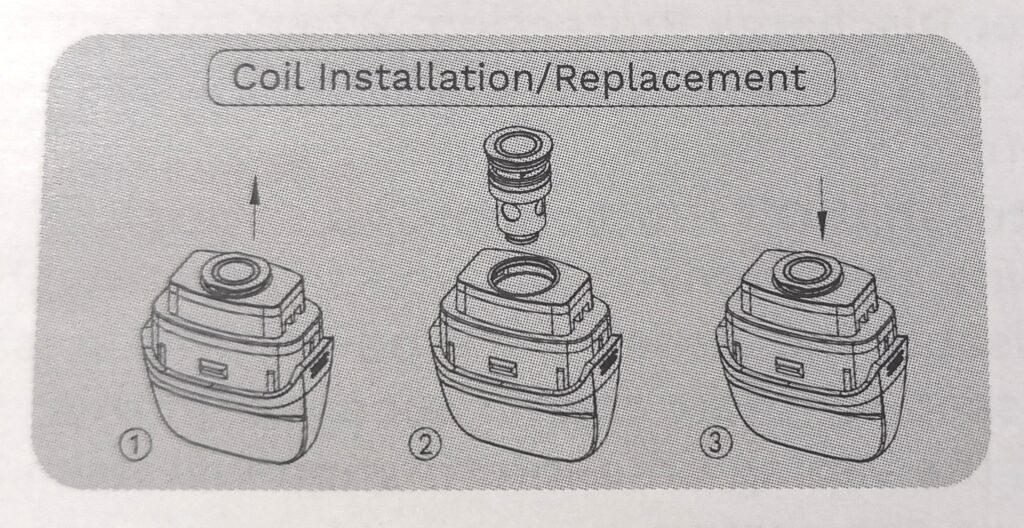
Coil Installation
Make sure the cartridge is empty before
installing the coil. Insert the coil firmly into thecartridge.
Coil Replacement
Make sure the cartridge is empty beforereplacing the coil. Pull out the used coil andinstall a new one firmly.
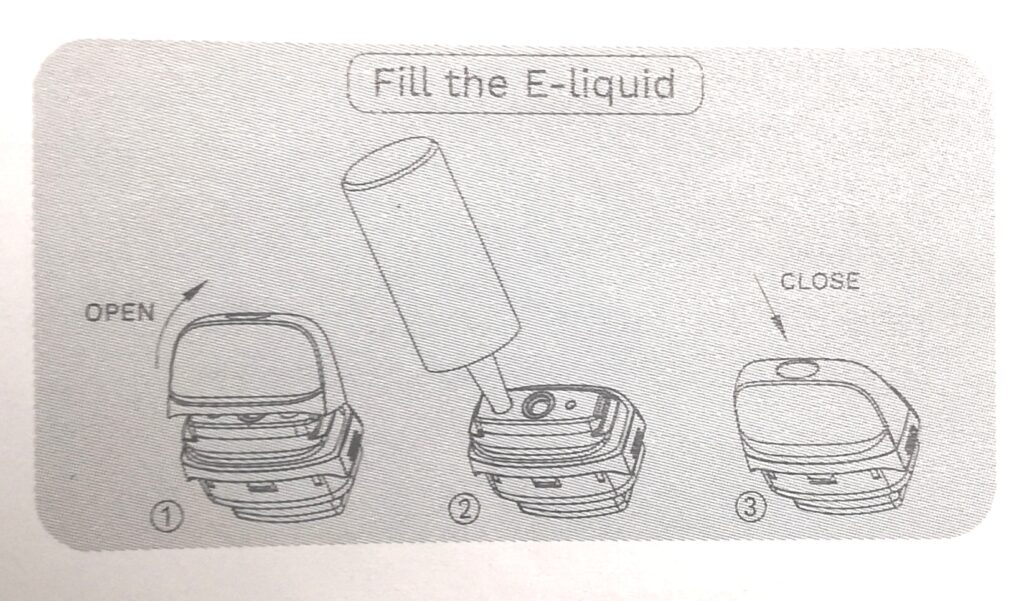
Fill the E-liquid
Snap off the drip tip from the cartridge.Gently insert the e-liquid filing bottle tip tothe flling slot.
Squeeze the e-liquid through the slot.
Install the drip tip back and confirm it shut firmly.
*If it’s the first time filling the e-liquid, please wait 5 minutes for the coil to prime.
Install the cartridge
Put the cartridge with installed coil onto thebattery. Make sure they are firmly connected.
Power On/Off
Press the power button 5 times within 2 Toggseconds to power on or power off the device.
Lock/Unlock the system
Press the power button 3 times continuously tounlock the system if the device is in the lockedstate. Without any operation within 5 seconds,the system will lock automatically.
Adjust the output wattage
Press the power button gradually in theunlocked stateto adjust the output wattage.
To avoid overheating, set the device’s output upawattage only within the recommended wattageoutput range specified for the coil.
Adjust the airflow
Adjust the airflow toggle to customize yourvaping experience.
Start vaping
In the locked state, hold the power button andinhale through the drip tip. Release the powerbutton and exhale.
Charge the device
Plug in the Type-C USB cable to charge the battery. The battery level will be displayed on the OLED screen. When it’s fully charged, the device will stop charging automatically.
for more vape device info, please visit wwww.sourcemore.com
Related posts

