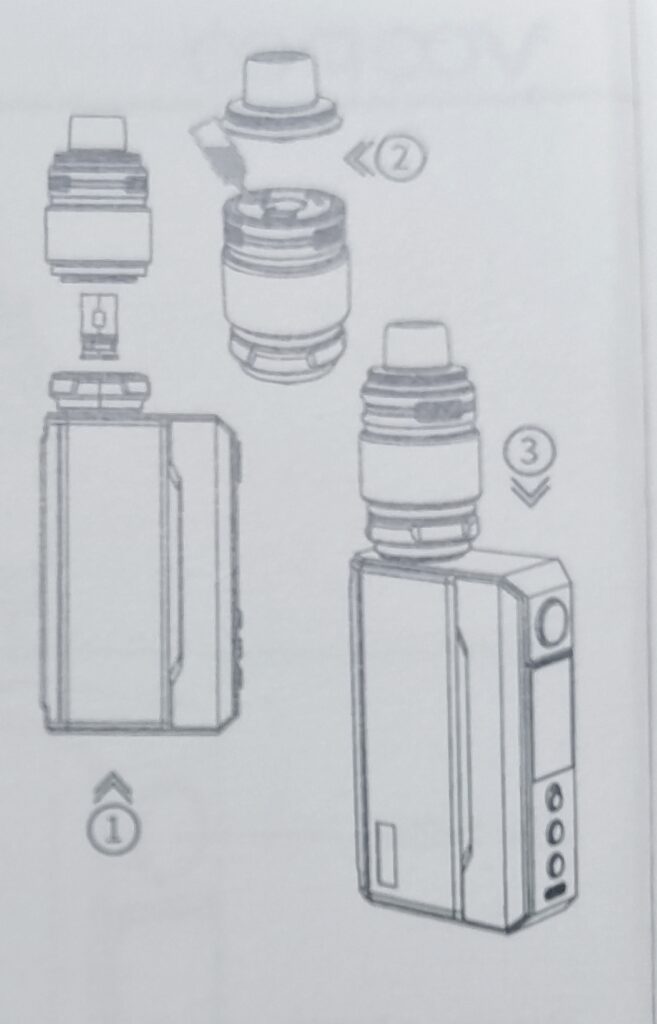
Operation Steps
Step 1. Install coil
Unscrew the base, pull out the coil, and Insert the coil from the bottom of the tank.
Step 2. Fill e-liquid
Unscrew the top cap, refill e-liquid from filling slots, then screw the top cap. It is recommended to keep the e-liquid tank two-thirds full.
Step 3. Start to use the device
Let the coil saturated for about five minutes and you are free to use the device. You can adjust the airflow and power in order to enjoy optimal vaping experience.
Interface Introduction
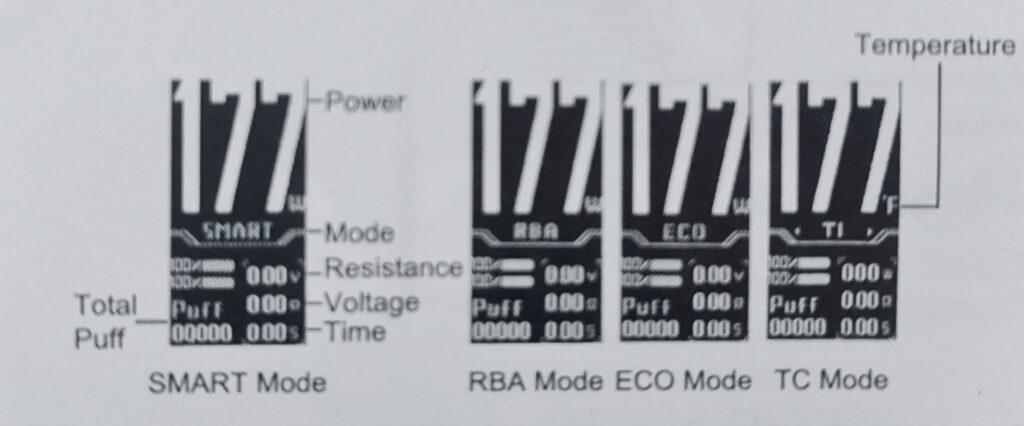
Function description
1. Turn on/off the device:
Toggle multi-function switch
Press the Fire Button five times quickly (when the multi-function switch is set to “Lock/unlock device”)
2. Lock/unlock device:
Toggle multi-function switch
Press the Fire Button three times quickly(when the multi-function switch is set to “on/ off device”)
3. MENU: Press the “+” and “-” keys at the same time to enter the menu, use the “+” “-” to select options, and press the Fire Button to confirm.
4. Multi-Operation mode settings: After entering the setting interface, select the “Mode” option, and select the operation mode of the device in the sub-interface.
SMART: this mode under which the coil is used can identify the best power and prevent the coil from burning due to high power.
RBA: User-Defined power adjustable from 5W-177W.
ECO: the device enters power-saving mode to ensure battery life
TC:
a). Support three kinds of heating wire: Ni200, Ti,SS316, SS430;Tc adjustable range: 200-600F 1 100-315C
b). Press the fire button and the “-” button at the same time to choose the “C” or”F”
c). Press the fire button and the “+” button at the same time to adjust the power from 5W to 80W.
d). TC Mode Custom Mode Coil Cooling Value Coil
Coefficient Coil cooling value range: 0.05-3.02.
5. Multi-function switch settings: After entering the setting interface, select the “Switch” option, and select the function of the switch key in the sub-interface: “Turn on/off the device” or “Lock/unlock the device” or “Lock/unlock the power “.
6. PUFF RESET: PUFF data will be cleared
7. About Device: Display device information
8. Colour: Choice UI colour.
9. Charging: Support charging with 5V/3A. It is recommended to use the Type-C cable provided by VOOPOO to charge the device.
10. GENE CHIP: Display the corresponding graph by simulating the amount of vaping per puff.
11. Software upgrade: Consumers have access to upgrading the software to the latest version on
VOOPOO official website(www.voopoo. .com), requires the specific Type-Cable to connect voopoo product to the computer. Please keep your device fully charged.
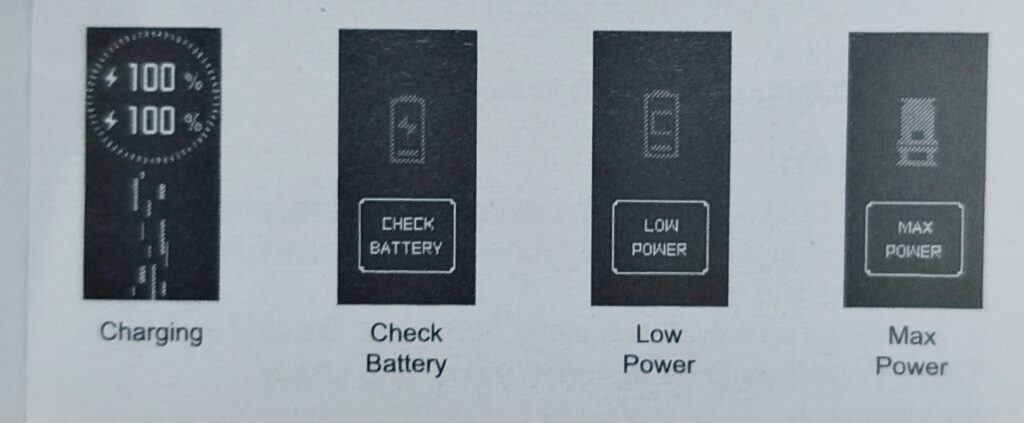
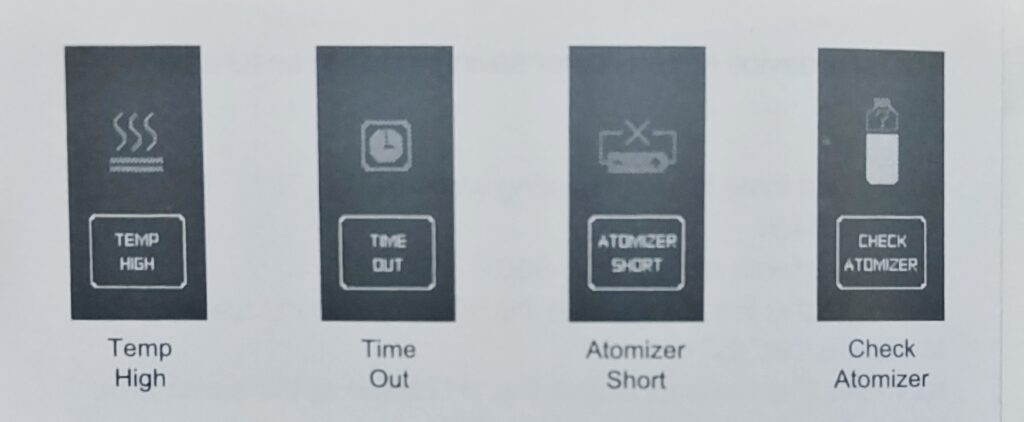
12. Status notification
Einsetzen der Batterie
1. Remove the magnetic C-type battery cover
2. Install the prepared 18650 battery from the bottom according to the correct anode and cathode indication (It is recommended to use high-rate battery, with discharge current 230A.)
3. Close the battery cover
Security Protection
Overtime Protection
Overheating protection
Short-circuit protection
Output over-current protection
Low battery protection
Anti-reverse battery protection
Overcharge protection
Precautions for Daily Use of Leather andWood
1. Please try to avoid scratches by sharp objects or direct friction against rough articles.
2. Please try to avoid contact with corrosive substances such as acids and bases, or alcohol or alcoholic liquids from coming into contact with leather surface.
3. Please use a soft cotton cloth to clean the dirt on the leather surface.
4. Avoid prolonged exposure to sunlight.