


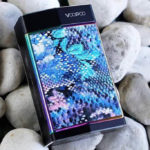
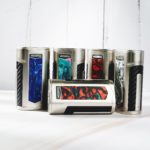
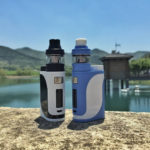
1. DRAG Ecig Box Mod Overview
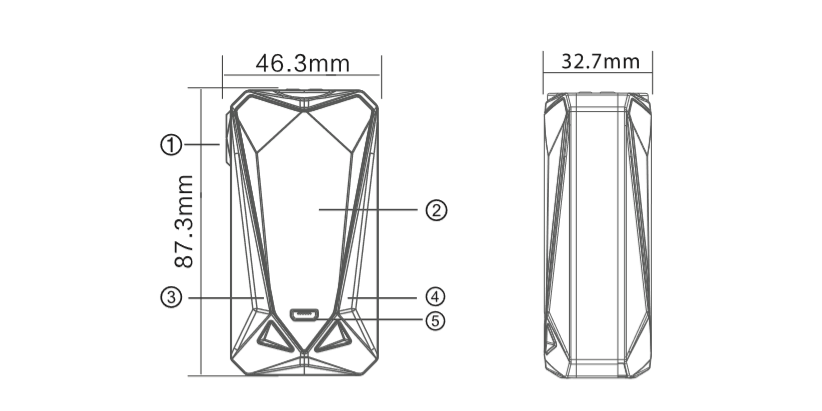
2. Dimension: 90x54x24mm
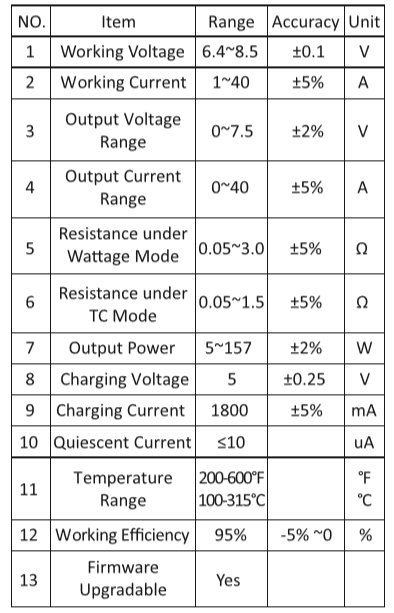
3. Specifications:
4. Safety Protection Function:
A. Battery Reverse Protection
B. Switch Timeout Protection
C. Over-temperature Protection
D. Output Over-current Protection
E. Overcharge Protection
F. Over discharge Protection
G. Short-circuit Protection
H. Support Balance Charge with difference brand battery
5. Instruction:
A. Power on/off:
Press the fire button 5 times continuously.
B. Mode Switch Instruction:
Press fire button three times quickly to change between the four interfaces:
Constant power temperature control SS/NI/Ti.
Constant Voltagetemperature control 55/NI/Ti.
C. Temperature Adjustment:
When temperature was set to 1oo·c, keep on pressing the down button, temperature will °
turn to 600 F.
When temperature was set to 200F, keep on pressing the down button, temperature will turn to 315℃
Adjust the step: 1
Quickly press fire button 4 times can get into wattage adjustment interface. Then you will see the letter “W” is flashing. The adjustable wattage is SW to 80W.
D. Wattage Control Instruction:
5- 129W is normal mode, each step is 1 watt. Check the display as shown below:
![]()
130-157W is Super Mode, each step is 1watt. Check the displays as shown below:
![]()
PS:
a. The device can match the right power according to the value of resistance automatically.
b. Resistance range under Super Mode is 0.1-0.30
c. Voltage regulation: 0.5~7.5V adjustment step: 0.1 V. The device can automatically recommend an optimum voltage for your atomizer’s resistance
d. You can switch between voltage and wattage modes in the function menu.
e. Combination key instruction:
Press up and down buttons at the same time for 1.5 Seconds, the device will enter Function Menu Interface.
Press fire button and up buttons at the same time for 1.5 Seconds, it will be locked. Press the up and fire buttons simultaneously will unlock the device.
PS:
Under the locked Mode,”UP” button, “DOWN” button and “FIRE” butons are not available, Combination Key for operation is ok
c. Press fire button and down button at the same time for 1.5 Seconds, the screen will flip.
G. Function Menu:
Press up and down buttons simultaneously for 1.5 seconds, enter the function menu Interface. Press up button or down button simultaneously to choose the function. Press the fire button to make confirmation and go to next step. You can make the adjustment according to pressing up or down button simultaneously. When you finished the adjustment, press fire button 1.5 seconds, the device will return to working interface.

a. The Selection under Power Mode Interface:
H. Customization Mode:
Press up and down buttons simultaneously for 1.5 Seconds, the device will go to the function menu Interface. Press up and down button to choose the Customization Mode and press fire button to go into Customization Mode Interface.
![]()
Under Customization Mode, Press fire button 3 times continuously, 4 kinds of Customization Modes can be switched sequentially:
Stable Power (W) Mode, Temperature Control Mode: TC-SS316/TC-Ni200/TC-Ti.
a. Press up and down button, Mode Ml to MS can be sequentially switched.
b. Quickly press fire button 4 times, the device will go into the second Customization Mode. And the function only works under Customization Mode. (Under Power Customization Mode interface, the right corner will show the adjusted power value.
Under Temperature Control Customization Mode interface, the right corner will show the adjusted temperature control value.)
Instruction after the device getting into the customization interface:
Press up and down buttons simultaneously to make adjustment manually. And press fire button shortly time will cause the device go into the next 1-second-adjustment. Then press the fire button for 1.5 seconds to save the setting and go back to the customization mode.
![]()
I. Sleep Mode:
If there is no operation for 30 seconds, screen will turn off. No operation for 30 minutes after the screen off, the device will enter sleep mode. If resistance was changed before sleeping mode, screen will prompt YES/NO on interface; If resistance was changed in sleep mode, screen will not prompt YES/NO on the interface. Press any key can recover display from sleep mode.
J. Customization:
You can set the device through computer firmware which developed by Woody Vapes Inc., For example you can set: pictures, temperature data, temperature curve and power curve etc, Make sure every puff you can get the best taste and comfortable feeling.
K. Charging:
When connecting the USB charger with SV power source, it will go into charging mode. At the first 30 Seconds of charging, the battery icon will show the charging start.
If no operation for 30 Seconds, the mods will go into power saving mode, It will display full battery icon (Figure 1).
If the capacity for two batteries are different, the battery icons on the display are different.
PS: Fully charged, It will display the full battery icon (Charging after the device power off, the screen will show the battery icon and charging status as well.)
![]()
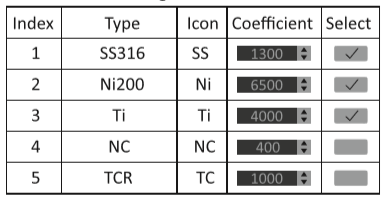
L. The TC wire can be turn on or off through APP
function when the device connect with computer.(Factory default: 55316, Ni200, Ti) 55316, Ni200, Ti, NC, TCR, The selection of minimum number is 1, Maximum selection is 5.
Coil advanced setting and select
M. Function prompt:
Overtime protection: Time-Out
Check New Atomizer: NEW YES (+)
COIL NO (-)
Low Battery: Low Power
Low Battery Voltage: CHECK BATTERY
Atomizer Short: ATOMIZER SHORT
Check Atomizer:CHECK ATOMIZER
High Resistance: HIGH ATOMIZER
Over Temp Protection: TEMP HIGH
Locked: LOCK
Unlock: UNLOCK
Power Off: OFF
N. Tips:
a. Charging Time: About 3H under SV 2A Input.
b. Support vaping while the device is charging (and also support user to adjust power, adjust temperature, switch mod and combination function during the device is charging.)
c. Requirement for the specification of battery:
1). 18650 battery with discharging rate is more than 35A.
2). Same brand, model and specification for two
batteries.
d. Suggested battery brands: Sony, Samsung.
e. Screen: 0.91 inch OLEO.
f. Accommodation coefficient of the TC wire Regulating Temperature control wire default Value![]()
Ni: 6000~7000 Standard Default Value: 6500 Adjusting Rate: Short time press: 1, long time Press: 10
Ti: 3500~4500 Standard Default Value: 4000 Adjusting Rate: Short time press: 1, long time Press: 10
SS: 1000~1600 Standard Default Value: 1300 Adjusting Rate: Short time press: 1, long time Press: 10
NC: 200~600 Standard Default Value: 400 Adjusting Rate: Short time press: 1, long time Press: 10
TC: 100~7000 Standard Default Value: 1000 Adjusting Rate: Short time press: 1, long time Press: 10
Tips:
a. If the accommodation coefficient of TC wire is higher, the temperature will be higher.
b. Wire from difference suppliers, it will be a little different, please adjust the Temperature coefficient of the TC wire to get the best feeling for vaping.
c. Please adjust it slowly, or the cotton will be burned. g. The cooling value of TC wire can be adjusted. Cooling value adjustable range: 0.05-1.50, Adjusting Rate: 0.0010,
This function is only available under temperature control mode.
The adjustable range is ±20% of current resistance
Warning
a. Because this product adopts 5V rechargeable series circuits, and also it supports balance charging function, so the situation of heating during charging is a normal phenomenon.
b. Please stay away from fire, water and high temperature.
c. Please use high rate discharge batteries, over 35A is recommended.
d. Please gently use this device; do not drop, damage or abuse the device, or drop it in water, etc.
e. Please make sure to use the right working mode for different atomizers.
f. Please don’t use batteries with broken skin or which are not completely insulated.
Can I print the drag manual
Sorry, you can’t.
Help?! What should all 4 of my setting be on I can t get the top to go back to 9.99
what’s your mean?