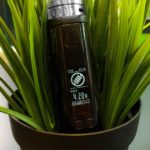
Uwell Nunchaku 2 Highlights list
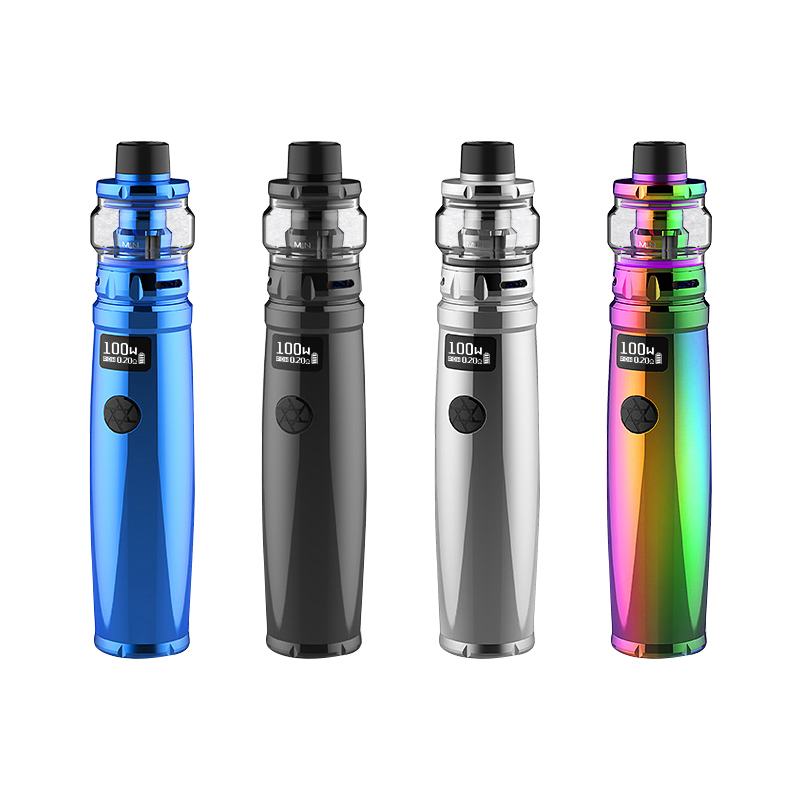
- Supporting 18650/20700/21700 batteries.
- PCBA is dust-proof and moistureproof, effectively protecting the core unit of the device.
- 6-axis MEMS sensor for a new operating experience.
- The filler holes have a silicone check valve to aid in filling.
- New honeycomb meshed coils
- Patented Self-Cleaning Technology
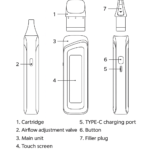
NUNCHAKU 2 MOD Instructions
1. Power on/off
Click the fire button 5 times within 2seconds to turn on/off the mod. the UWELL screen will display “UWELL” when it’s powered on, it will display “Power off ” when it’s powered off.
2. Vaping
While the device is on, hold the fire button to vape: it will automatically stop fining when the button is held for longer than 10s
3.Mode Switch & Parameter Settings
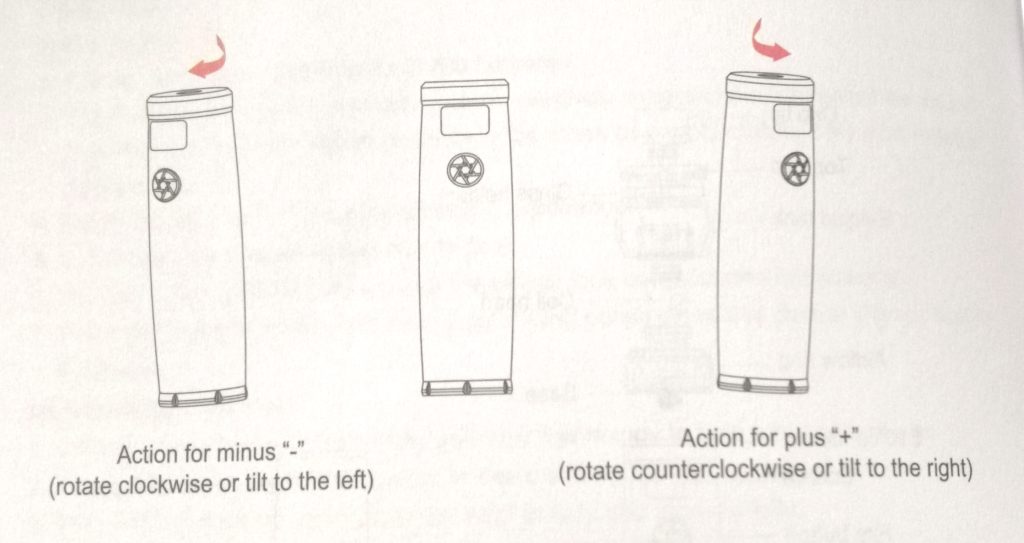
The way to adjust the mode and parameter by tilting the device: Hold the lower part of the device face the screen, tilt to the left or to the right to adjust, and then return to the original place.
1) Press the fire button 3 times in 2 seconds to enter the mode switching and parameter setting menu.
2) Tilt the device to the left to realize the function: bit the body to the right to realize the +function; keep tilting for quick adjustment
3) Hold the fire button to exit.
Mode switching:
POWER MODE, TCR MODE.MECH MODE. Factory Settings are selected by tiling the body, press the fire button to confirm.
Parameter settings:
1). POWER MODE
After entering the P0WER MODE, adjust the power by tilting the body, keep tilting for quick adjustment
Attention: The output voltage will decrease gradually during vaping When the output wattage cannot reach the set wattage. the device will lower the wattage automatically, and then the screen will display the output voltage after automatically adjusting the wattage.
2). TCR MODE
a). After entering the TCR mode, the temperature flashes and can be adjusted by tilting the body.
b). After pressing the fire button to confirm, the power flashes and can be adjusted by tilting the body.
c). After pressing the fire button to confirm, the TCR flashes and can be adjusted by tilting the body.
d). TCR range: 0.00010-0.01000;Recommended TCR of commonly used heating wire: SS316:0.00088士0.00020:NI200:000690士0.00020
4. Set the reference resistance under temperature control mode
In the TC mode, when the atomizer ith the temperature control material is installed, it will correct the reference resistance. Resistance detection is required after switching to the Tc mode.lt should be used at room temperature or vaping experience under TC mode would not be as expected. After switching atomizer, press the fire button and the screen wl ask if it’s a new coil. Please til the body to choose
5. Resistance detection
Resistance deletion shall be done automatically. The operation mode would be saved as the previous setting. Resistance range is 0.1-30 ((WBypass) and 0.1-1Q (TC)
1).lf there is no atomizer or the coil resistance is too high, press the fire button the screen will indicate to check atomizer.
2).lf the coil resistance is too low. press the fire button the screen will indicate a short circuit.
6. Low power alert
When the device has a low battery, press the fire button the screen will indicate low battery.
7.Temperature protection
The output wi be out ott if the PCA temperature increases to 80’c during vaping. the screen will display “OVER TEMP.
8. Reverse battery protection
The device is equipped with reversed battery protection. f the batteries are reversed, the device can not tum on.
9. Charging
Plug the Micro USB cable to charge, the screen will indicate a dynamic charging icon; when the battery is fully charged, the screen will display full bars.
NUNCHAKU 2 TANK
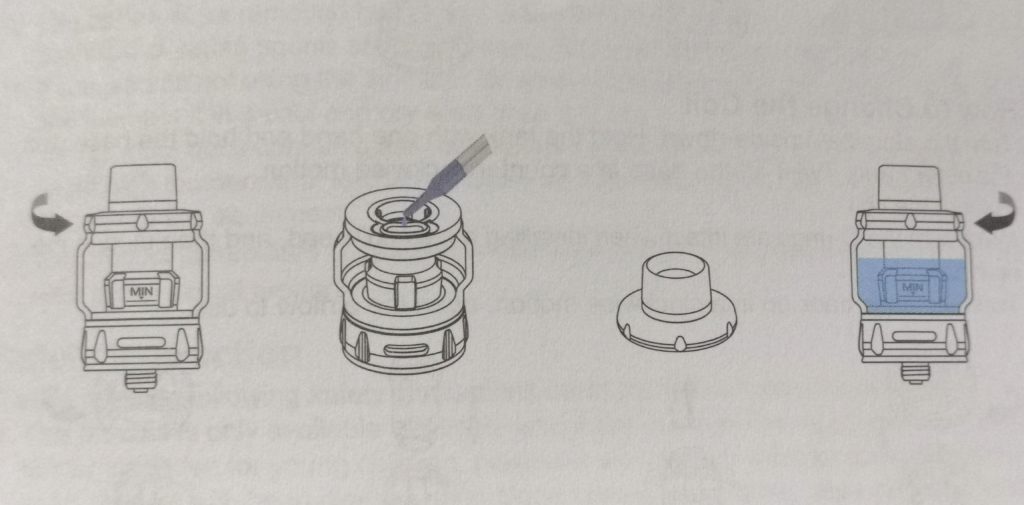
1. How to Top Fill
1). Turn the airflow ring to the closed position.
2). Twist the top cap a quarter turn counter-clockwise to unscrew the top cap.
3). Add juice.
4). Press down and twist the top cap a quarter turn clockwise.
Caution:
a). Don’t put juice in the center hole.
b). Do not leave the top cap off for a long time to avoid leaking.
c). instal top cap back and tighten it after refilling to prevent leaking.
d). When filling only use a bottle that has a nozzle that can fit inside the opening of the tank which is 3.5 millimeters wide.
e). When using a new coil and then filling the tank, please let the tank sit for 10 minutes to prime the coil completely.
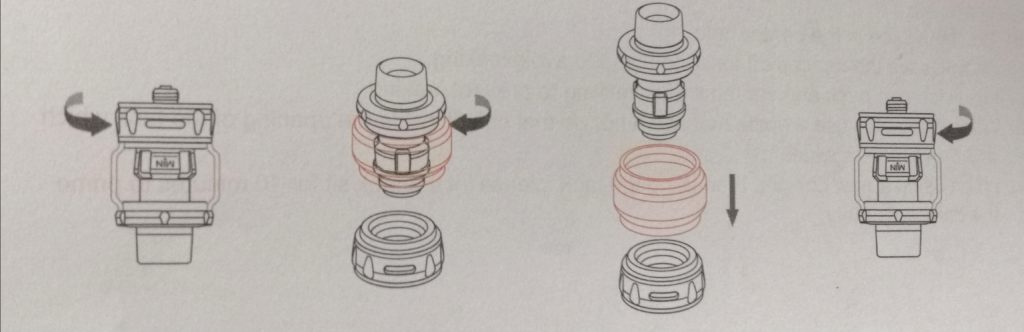
2. Glass Changing &Tank Cleaning
1). Turn the atomizer upside-down. Twist off the base counterclockwise.
2). Hold the top cap with one hand, hold the glass with the other hand and twist off the glass with a clockwise turn.
3). Re-install the glass after cleaning or changing.
(Caution Make sure that the glass is flush with the mounting surface of the top cap. Check the O-rings while re-assembling that they are not protruding out of the metal groove to avoid leakage.)
3. How to Change the Coil
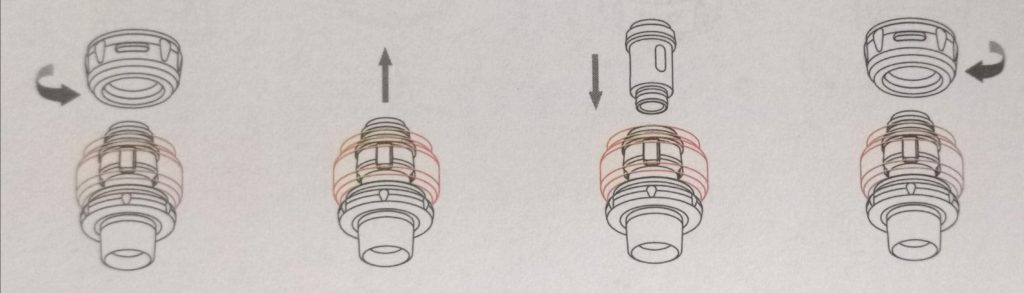
1). Tum the atomizer upside-down. Hold the tank with one hand and hold the base with the other hand. Twist off the base in a counterclockwise motion.
2). Pull out the coil.
3). Make sure the O-rings are intact when installing a new coil head, and then plug in the new coil.
4). Twist the base back on in a clockwise motion, open the airflow to use.
If you have any questions or ideas, welcome to leave them below the comment area!
Related posts